The guide or steps used in this tutorial can be found in the YouTube description section of the video guide.
This guide was done as a response to a request by one of our YouTube subscribers to create a tutorial on how to install the samba server role that supports Apple Time Machine on Ubuntu server 20.04 LTS. The request came after they watched a similar tutorial we did based on openSUSE 15.2 Leap.
In this guide we show you how to install a CCTV and NVR Solution on Ubuntu Linux! The software used is Shinobi. We have installed this at multiple client stores to monitor stock and general security.
In this guide we show you how to install FrontAccounting. An accounting package we use and have installed for many clients. It is a Web based Accounting system that is simple and powerful accounting system for the entire ERP chain. FrontAccounting is free and released under the GNU General Public License.
----------Guide Start----------
FrontAccounting - Install GuideApache & SQL Database serversudo apt-get install apache2 apache2-utils php-mysql php7.4 php7.4-gd php7.4-curl php7.4-zip php7.4-xml php7.4-mbstring mariadb-server mariadb-client
SQL user and DB Preparationsudo mysql -u root -p
CREATE DATABASE fadb;
CREATE USER 'fadbuser'@'localhost' IDENTIFIED BY 'yourpasswordhere';
GRANT ALL PRIVILEGES ON fadb.* TO 'fadbuser'@'localhost';
FLUSH PRIVILEGES;
QUITSecure DBsudo mysql_secure_installationDownload the frontaccounting software
Open Browser and navigate to and download the file. https://sourceforge.net/projects/frontaccounting/Open Terminal change dir to Downloads and extract the file:cd Downloads
sudo tar -zxvf frontaccounting-2.4.9.tar.gzCreate sub folder and move extract sudo mkdir /var/www/html/fa
sudo mv frontaccounting /var/www/html/faSet Permissionssudo chown -R www-data:www-data /var/www/html/fa
sudo chmod -R 755 /var/www/html/fasudo systemctl enable apache2
sudo systemctl restart apache2
Open Web browser and navigate to http://localhost/fa/frontaccounting and follow the onscreen install instructions.
----------Guide End----------
The HendGrow Minecraft Experiment This is a quick tutorial on how to connect and play on our open Minecraft server. Keep in mind this is open Anarchy / Survival server. This means that anything goes in regards to playing on this server.
The Minecraft server will be available for the foreseeable future dependant on demand.
(Including Apple Time Machine Support, Enabling Network Backups)
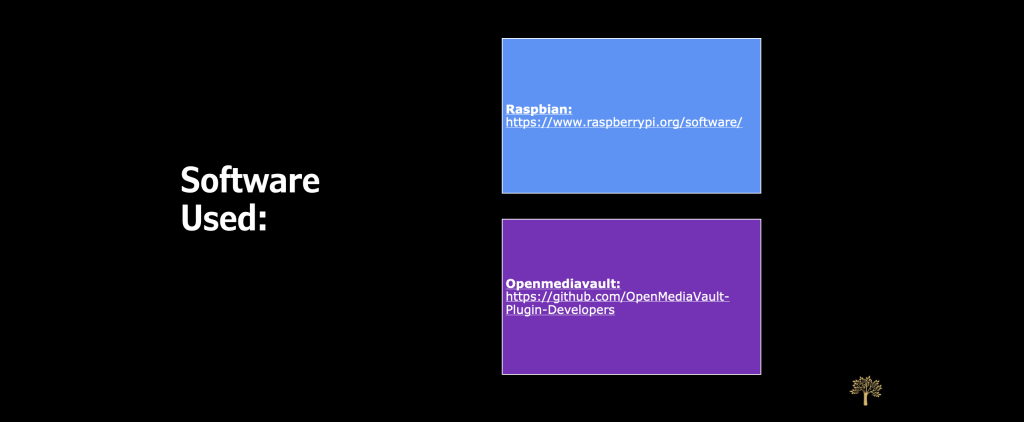
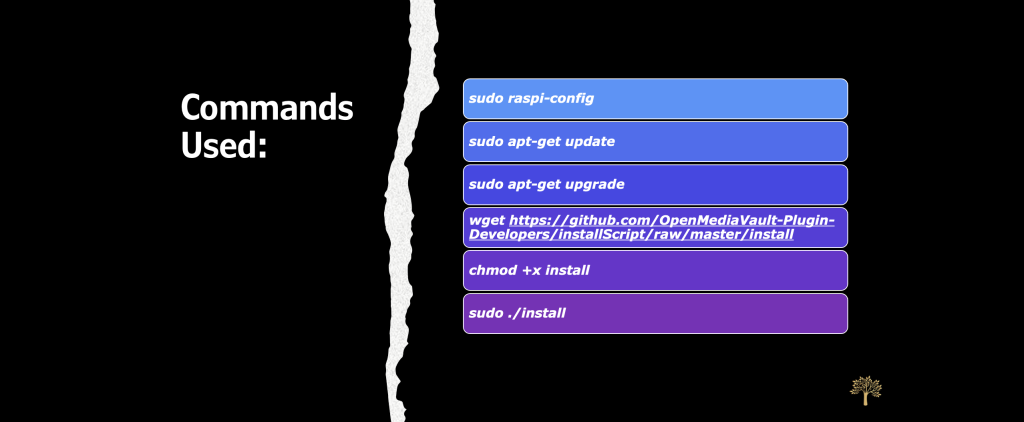
Walk-through of how to install a NAS based on (OMV) openmediavault on a Raspberry Pi. Best features for us is the ability to create a SMB share that has Apple Time Machine support. This enables us to backup all our Mac machines 🖥 / 💻 using time machine to the network. No more usb drives.
Walk-through of how to install a NAS based on (OMV) openmediavault on a Raspberry Pi. Best features for us is the ability to create a SMB share that has Apple Time Machine support. This enables us to backup all our Mac machines 🖥 / 💻 using time machine to the network. No more usb drives.
Walk-through of how to install NAS based on (OMV) openmediavault. We use this as it is simple to get up and running and use. Best feature for us is the ability to create a SMB share that has Apple Time Machine support. This enables us to backup all our Mac machines 🖥 / 💻 using time machine to the network. No more usb drives.
URL for openmediavault download – https://www.openmediavault.org/download.html
Open the command prompt and ssh to your ossec server.
ssh hgadmin@192.168.68.123
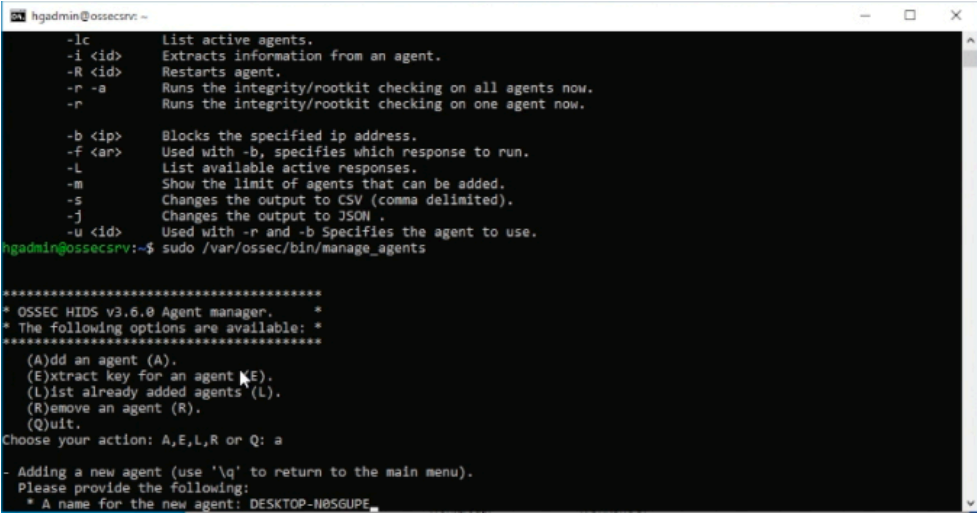
Launch the OSSEC Agent Manager once connected to your server.
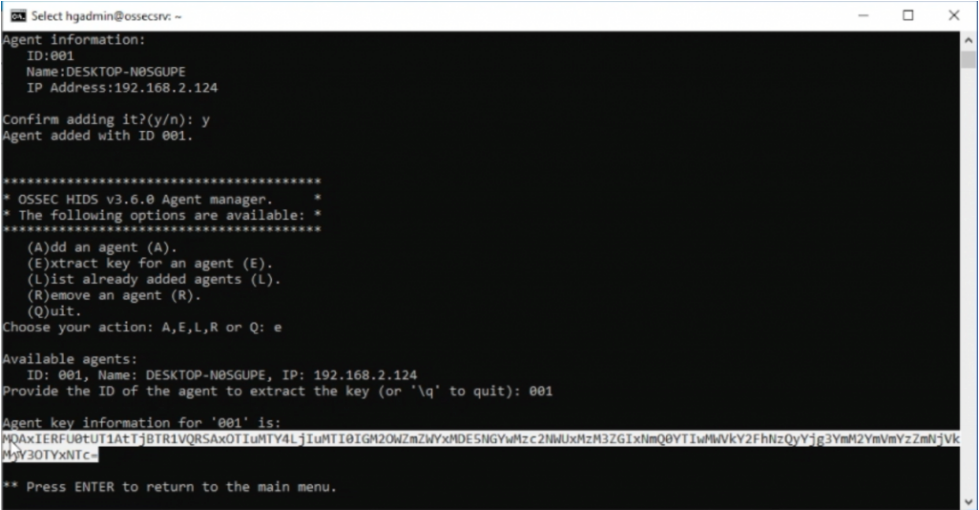
sudo /var/ossec/bin/manage_agents
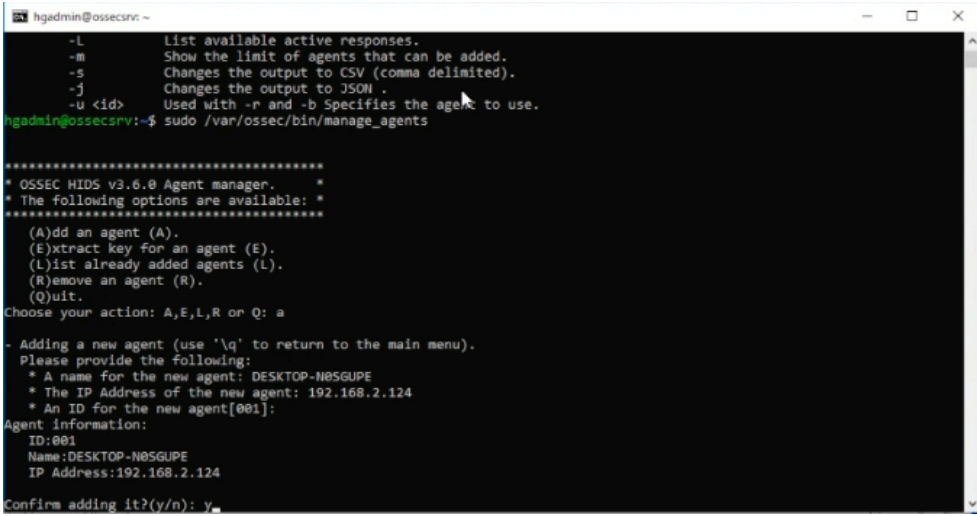
Input option (A) to add a new agent. Input your windows machines name when prompted.
Input the windows machines IP when prompted and confirm adding with responding (y)
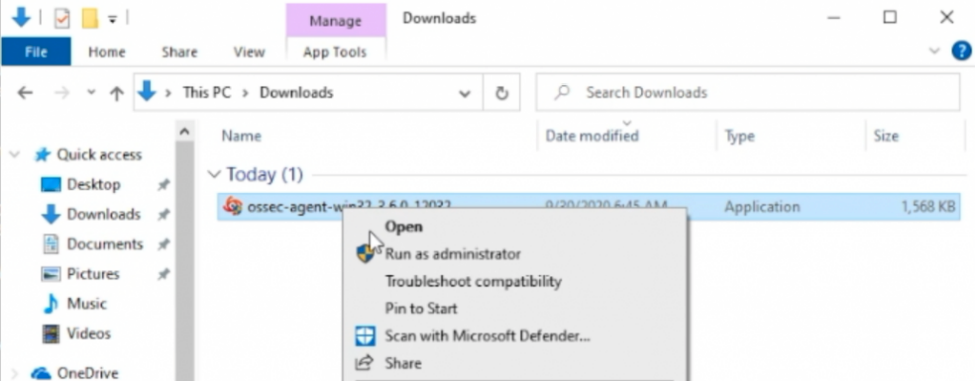
On the target Windows desktop. Launch the executable agent file you have downloaded as administrator. Should be in your downloads folder.
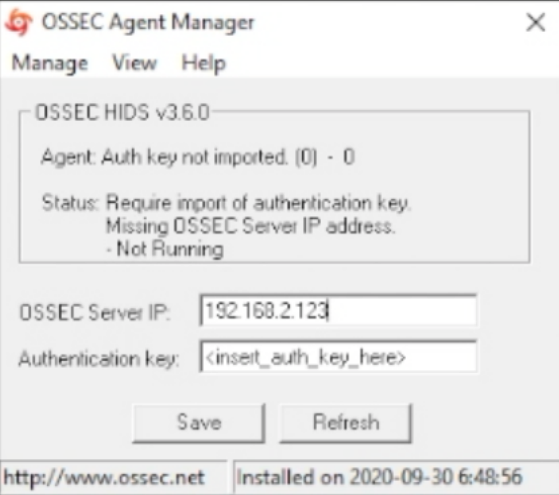
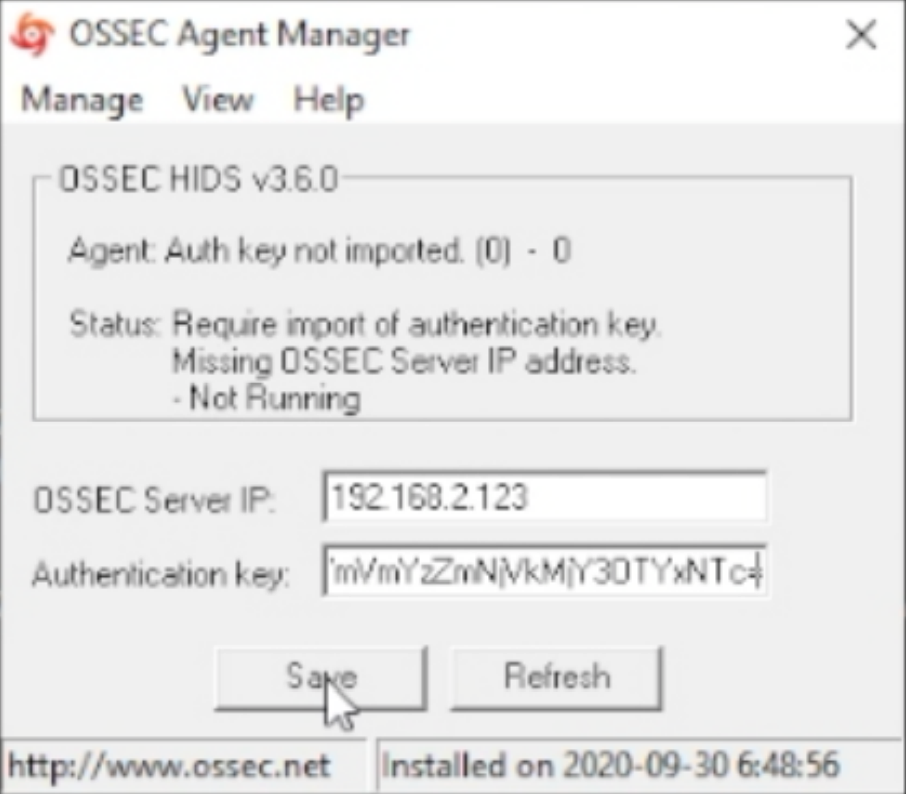
Open the OSSEC agent as administrator that you installed and enter the IP address of your OSSEC server.
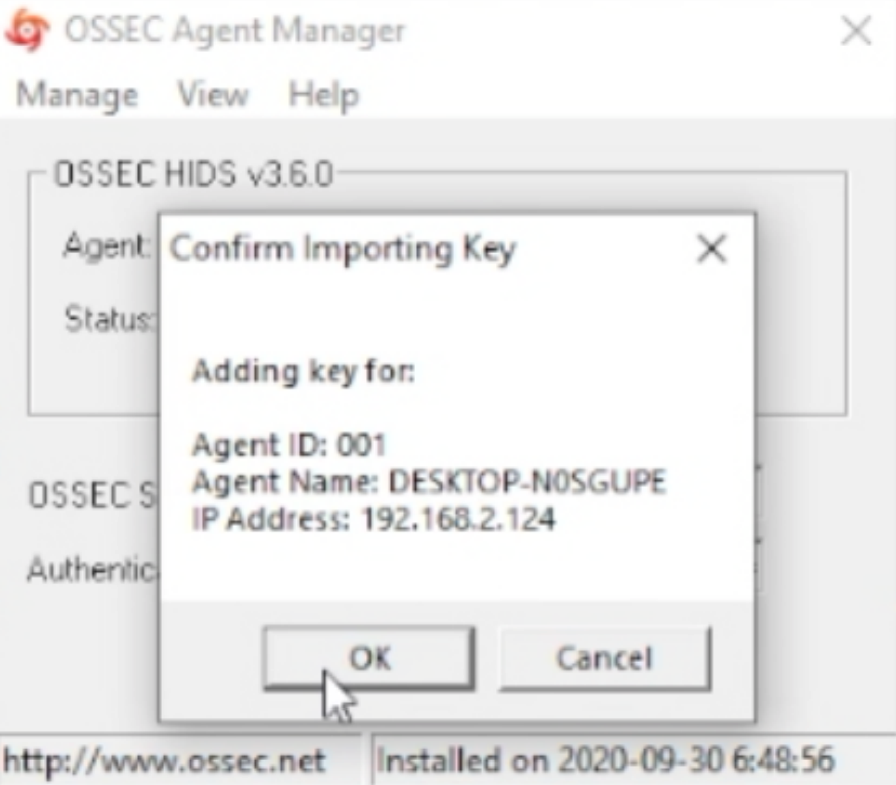
Open the command prompt window that you used to ssh to the OSSEC server. Extract the Key by inputting option (e) and then the corresponding Agent ID for the windows machine in the OSSEC Agent Manager that should still be open.
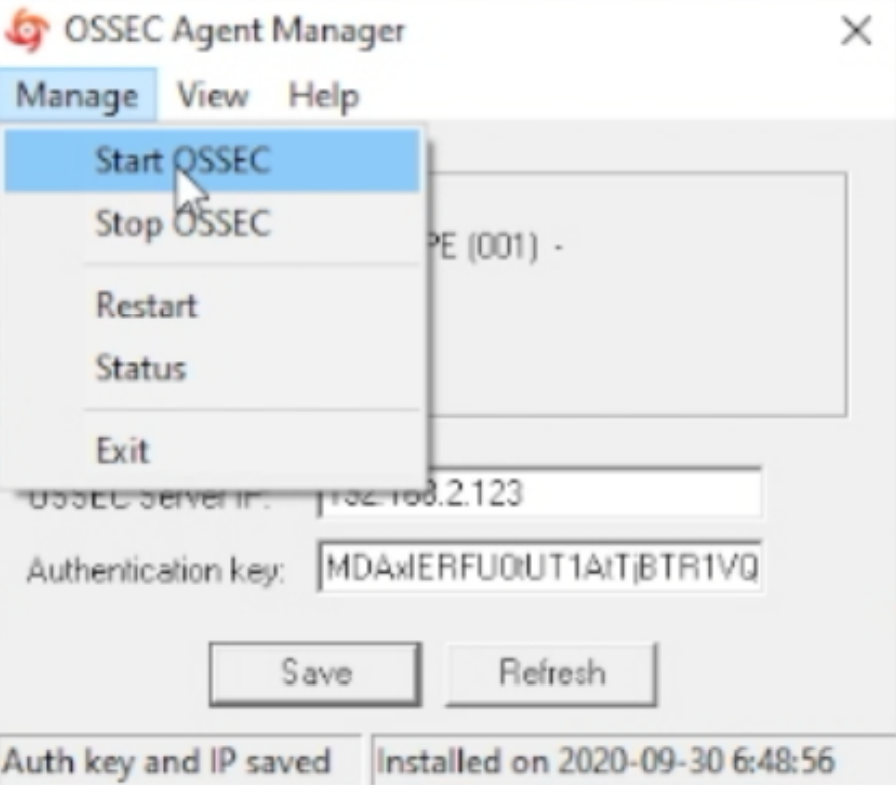
Highlight and copy the key, update the OSSEC Agent. Save the updated info and start the OSSEC Agent.
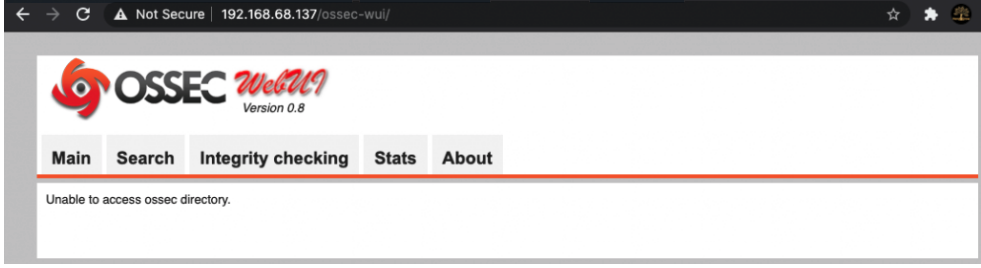
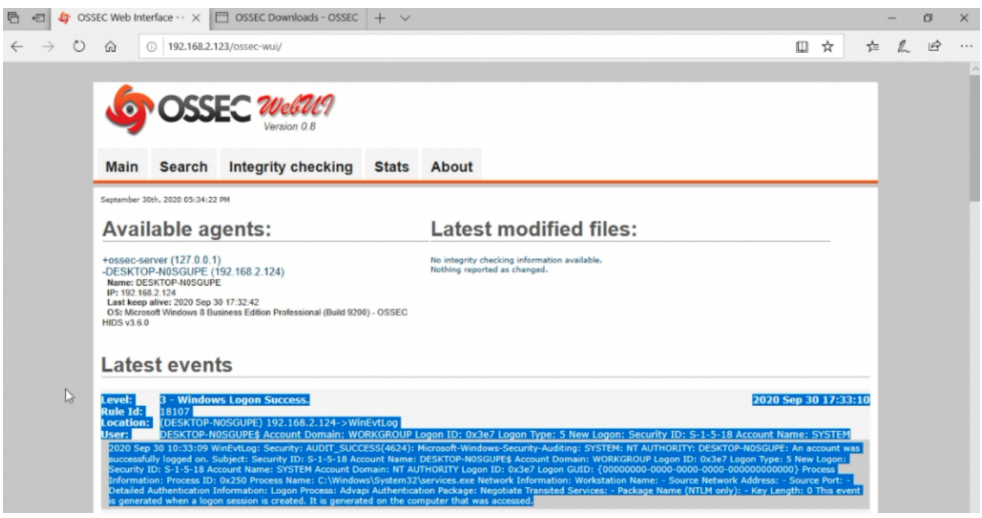
Open your web browser and navigate to your OSSEC Servers IP and specific port if you set one.
During this walk-through we will demonstrate how in download and install QRadar CE 7.3.3. via the OVA file provided by IBM. QRadar CE is a fully-featured free version of QRadar that includes a limited 50 events per second (EPS) & 5000 network flows a minute (FPS) perpetual license. It is the perfect solution to start learning QRadar or use it to monitor your home network.
*Q1 LABS, QRADAR and the ‘Q’ Logo are trademarks or registered trademarks of IBM Corp. Trademarks and related content are owned by their respective companies / owners.
—START— QRadar 733 Steps
1. Download the OVA from – https://developer.ibm.com/qradar/ce/
2. Double click on the OVA file you just downloaded to kick of the import to VirtualBox.
3. Initial login. User = root. / Password = password
4. When prompted enter your chosen password and confirm for the password change.
5. Type in ./setup.sh to kick off the install.
6. Accept the terms by pressing Enter.
7. Enter password of your choice for the web interface.
8. Open a compatible web browser and input the IP of your QRadar CE Server, In our example – “https://192.168.68.141”
This walk-through guides you through the process of Installing the world class, industry tested ticket system known as Request Tracker or RT. We start with a solid Ubuntu 20.04 base as the server combined with Perl, MariaDB for the Database and Apache2 as the web server.
2.2 Extract / unpack the file to /tmp and run the ./configure script provided.
tar xzvf rt-5.0.1.tar.gz -C /tmp
cd /tmp/rt-5.0.1/
sudo ./configure
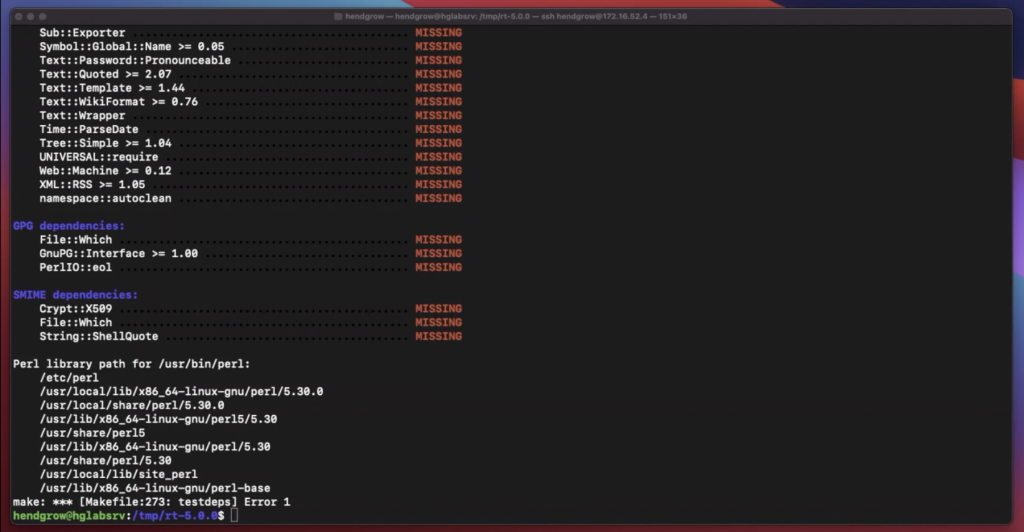
2.3 Ensure the required Perl and system libraries are installed with the command below.
sudo make testdeps
2.2.1 If the script reports any missing dependencies as shown image Image-1 below run the fixdeps command.
sudo make fixdeps
Image-1
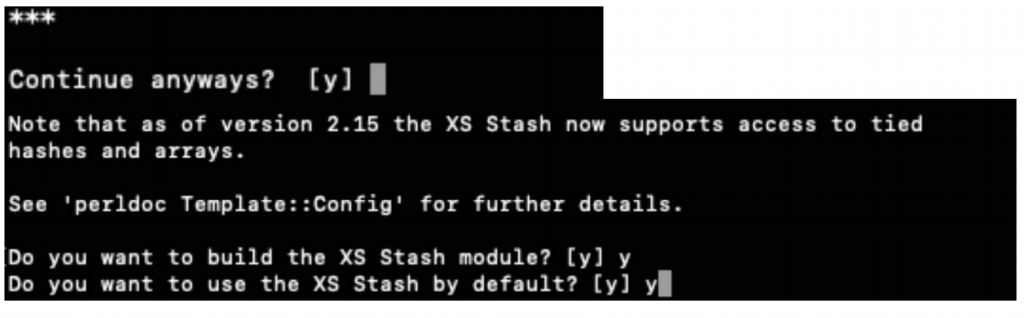
2.2.3 During our demo install we were promoted with the following three questions as shown in Image-3 while running the fixdeps script. We opted to answer yes.
Image-2
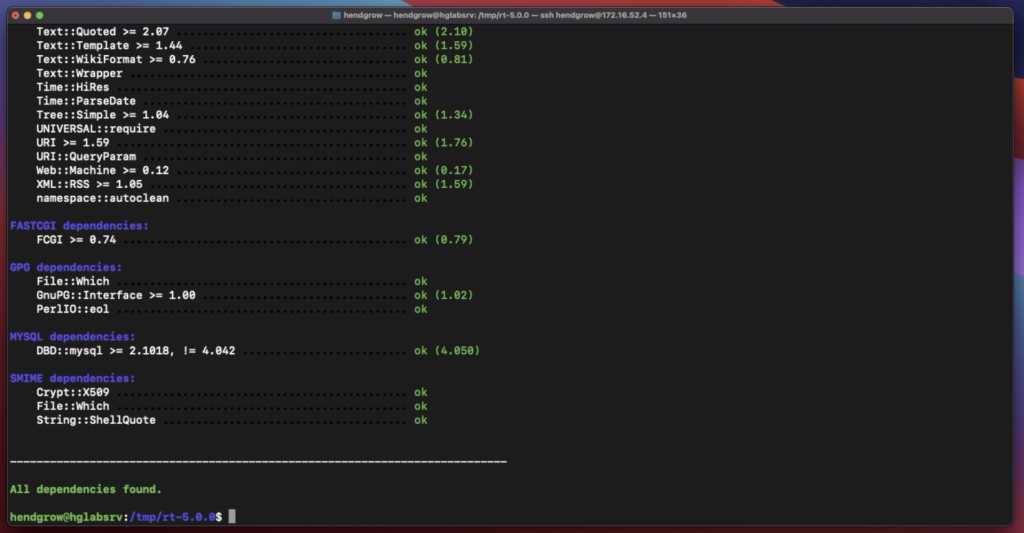
Once the fixdeps script is complete, validate all dependencies are present by running the testdeps script to confirm. If successful you should see similar out put as Image-3 below
sudo make testdeps
Image-3
2.3 Run the make install with appropriate permissions to install RT5
sudo make install
3 Initialise the Database for RT5
sudo make initialize-database
It will prompt you for a password. just press return/enter key.
Note: Only if the initialization fails run make dropdb and then re-run make initialize-database.
Once completed successfully you should see same result as shown in Image-4
Image-4
3.1.1 Change the default password for the RT database user. (We recommend for production systems to also change the user.)
sudo mysql -u root -p
It will prompt you for a password. just press return/enter key.
ALTER USER 'rt_user'@'localhost' IDENTIFIED BY 'your_new_rt_pass';
commit;
quit;
Although not covered in this guide, we recommend securing your MariaDB. Start with running the below script to setup up a min baseline.
sudo mysql_secure_installation
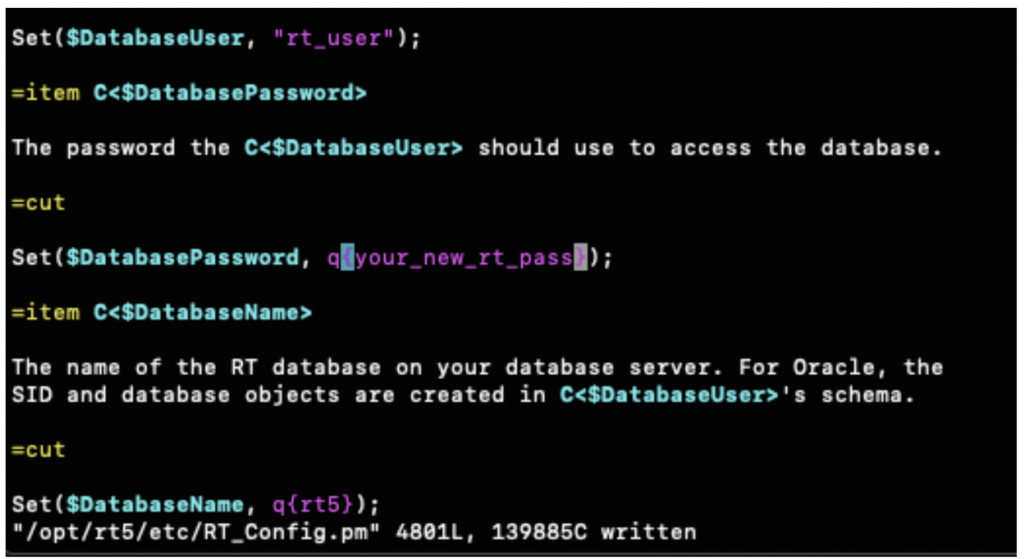
3.1.2 Update the RT_Config.pm config to reflect our password change we did for the RT database user rt_user.
sudo vi /opt/rt5/etc/RT_Config.pm
Edit the section as shown in Image-6 below
Image-6
3.2 Confirm we have a working RT instance running with the standalone rt-server.
sudo /opt/rt5/sbin/rt-server --port 8080
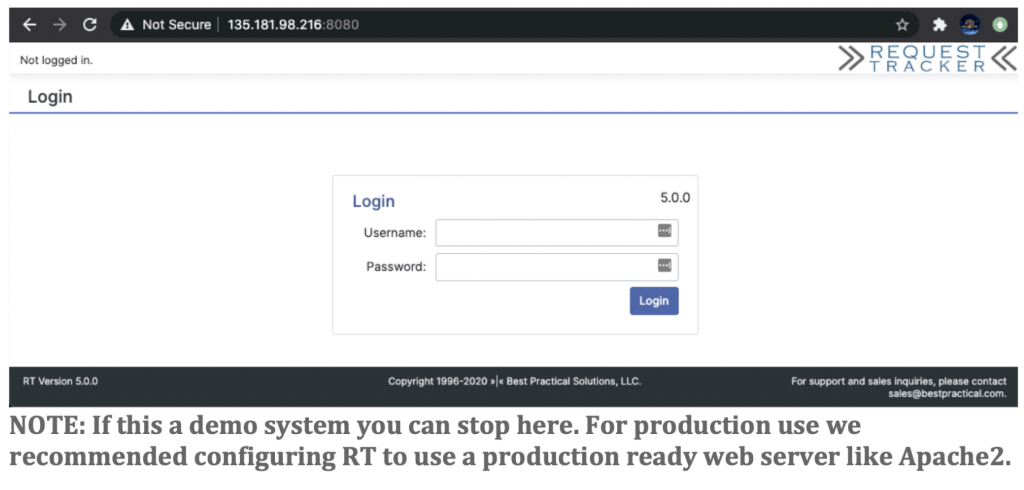
3.2.1 Open your web browser and navigate to your servers ip or FQDN and port 8080. For our demo server it is http://135.181.98.216:8080/. You should see the login page.
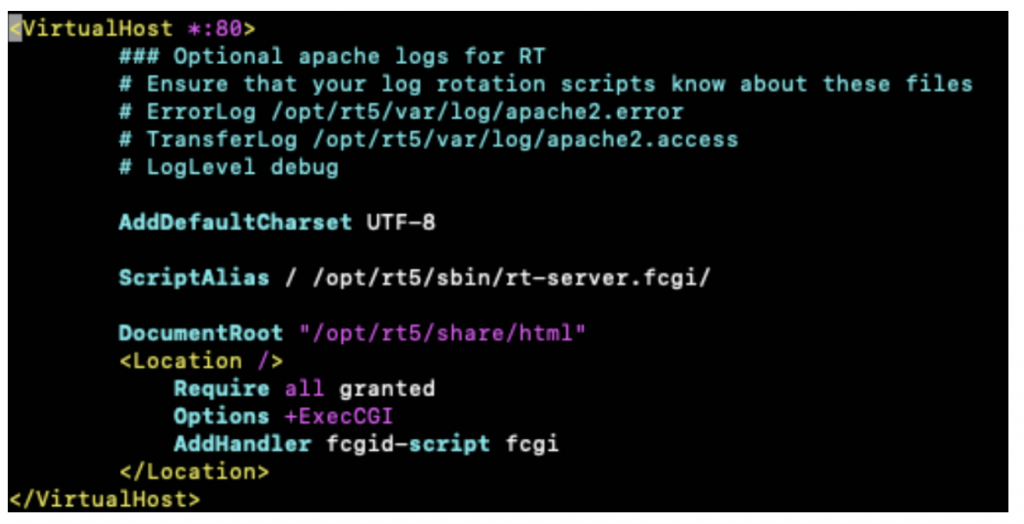
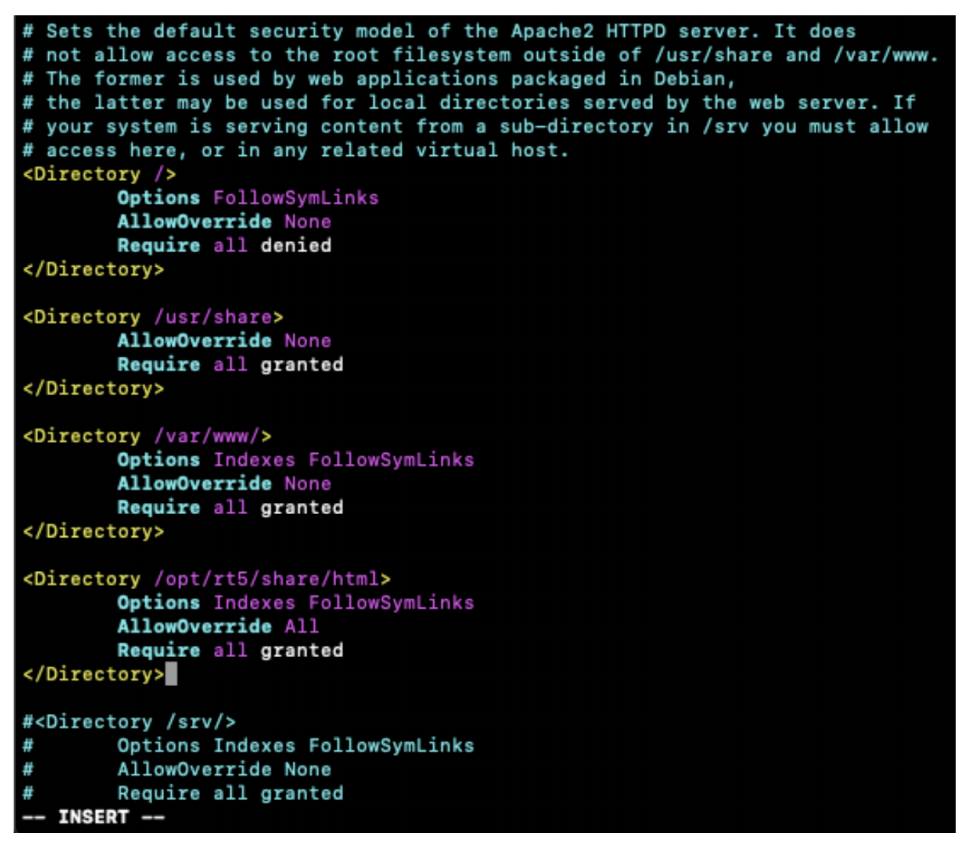
4. Configure RT5 to work with the Apache2 web server
4.1 Create a RT5 sites-available configuration file.
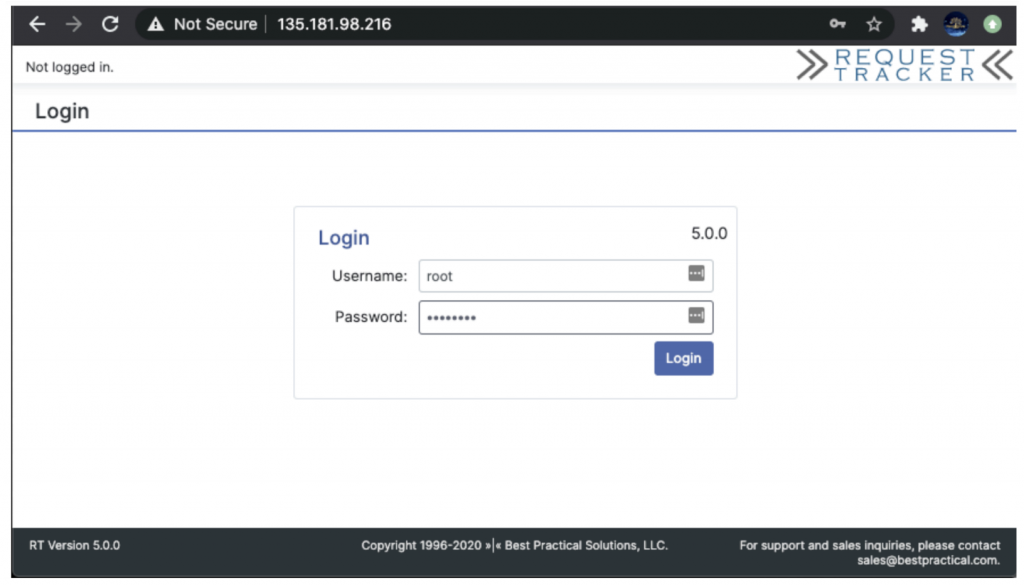
5.4 Open your web browser and navigate to your servers ip or FQDN. For our demo server it is http://135.181.98.216. You should see the login page. You should see the login page as shown in Image-7.
Image-7
NOTE: The default credentials for RT5 are: User: root | Password: password Your first step once logged in is to change the root password! It is a SECURITY risk! The next step should be to setup https for this site using letsencrypt for example.
How to remove the “Possible cross-site request forgery” RT message when creating tickets or making changes via the WUI etc.
Possible Cross-site request forgery message RT5
Edit the RT_SiteConfig.pm add an additional line to indicate your Webdomain either IP or FQDN.
Example below:
sudo vi /opt/rt5/etc/RT_SiteConfig.pm
Set( $WebDomain, 'your-servers-ip' );
Restart Apache
sudo systemctl restart apache2
There still allot to do, like configuring an RT email gateway, task scheduler, full text search and general system security etc. That’s potentially for a future guide should there be demand. This guide does not cover server / application hardening and security as it is a broad topic and not the aim of this guide. You should always harden your servers by default! Some useful links:
Secure your MariaDB installation – https://mariadb.com/kb/en/mysql_secure_installation/