This walk-through guides you through the process of Installing the world class, industry tested ticket system known as Request Tracker or RT. We start with a solid Ubuntu 20.04 base as the server combined with Perl, MariaDB for the Database and Apache2 as the web server.
To setup Request Tracker with email
—Install Guide Starts Here—
ssh to the Ubuntu server you have provisioned. Ubuntu 20.04 was used for this walkthrough.
ssh username@your_servers_ip
- Installing the some system base packages.
1.1 Ensure the system is up to date.
sudo apt-get update
1.2 Install some system base packages
sudo apt install build-essential apache2 libapache2-mod-fcgid libssl-dev libexpat1-dev libmysqlclient-dev libcrypt-ssleay-perl liblwp-protocol-https-perl mariadb-server mariadb-client
1.3 Installing some Perl modules
sudo /usr/bin/perl -MCPAN -e shell
1.3.1 When prompted with the below, input yes then q to quit
1.3.2 Installing the required Perl modules
sudo cpan install HTML::FormatText HTML::TreeBuilder HTML::FormatText::WithLinks HTML::FormatText::WithLinks::AndTables DBD::mysql LWP::Protocol::https
2. General RT5 Installation
2.1 Download and unpack the RT5 tar file to a temporary location.
Check for the latest version here – https://download.bestpractical.com/pub/rt/release/
wget https://download.bestpractical.com/pub/rt/release/rt-5.0.1.tar.gz
2.2 Extract / unpack the file to /tmp and run the ./configure script provided.
tar xzvf rt-5.0.1.tar.gz -C /tmp
cd /tmp/rt-5.0.1/
sudo ./configure
2.3 Ensure the required Perl and system libraries are installed with the command below.
sudo make testdeps
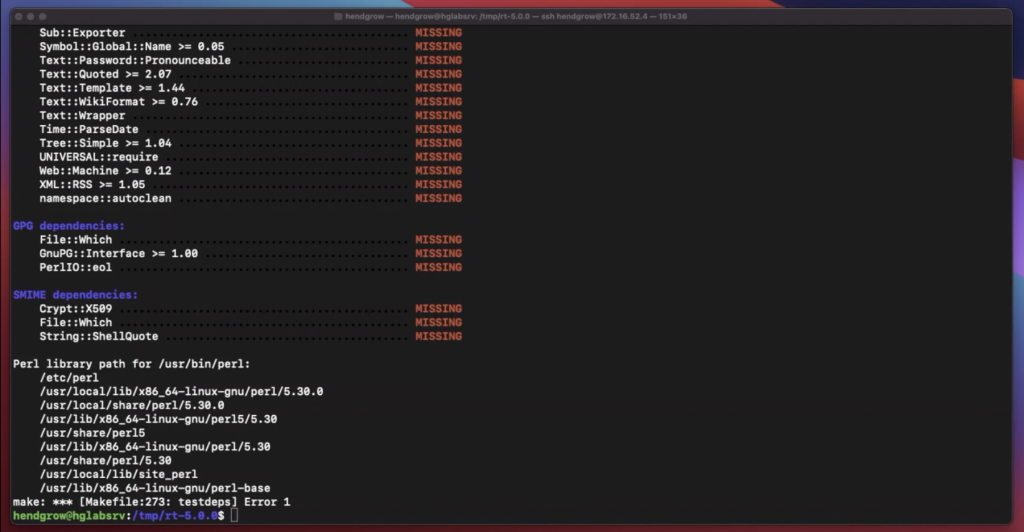
2.2.1 If the script reports any missing dependencies as shown image Image-1 below run the fixdeps command.
sudo make fixdeps
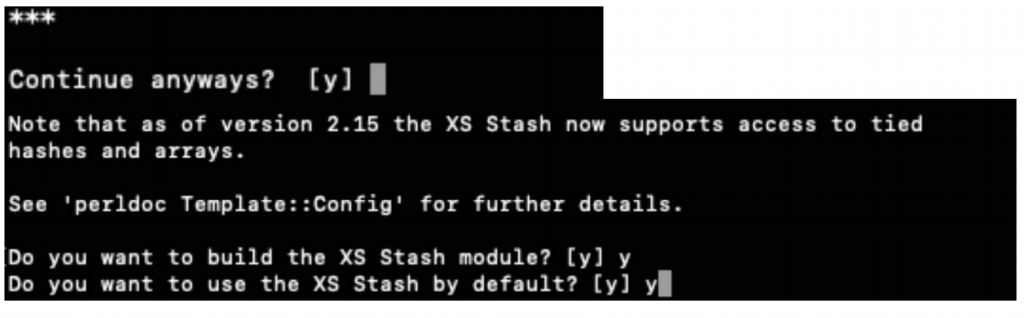
2.2.3 During our demo install we were promoted with the following three questions as shown in Image-3 while running the fixdeps script. We opted to answer yes.
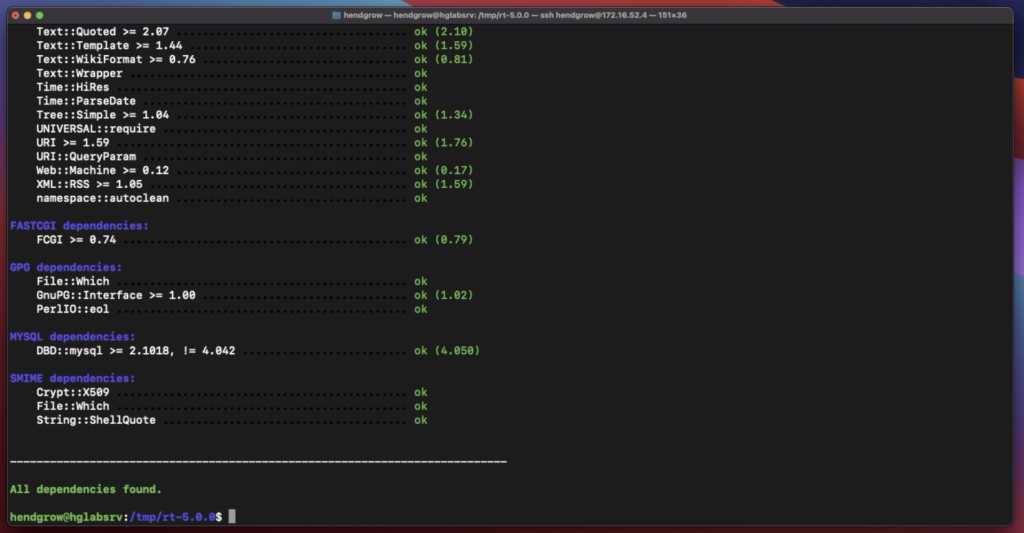
Once the fixdeps script is complete, validate all dependencies are present by running the testdeps script to confirm. If successful you should see similar out put as Image-3 below
sudo make testdeps
2.3 Run the make install with appropriate permissions to install RT5
sudo make install
3 Initialise the Database for RT5
sudo make initialize-database
It will prompt you for a password. just press return/enter key.
Note: Only if the initialization fails run make dropdb and then re-run make initialize-database.
Once completed successfully you should see same result as shown in Image-4

3.1.1 Change the default password for the RT database user. (We recommend for production systems to also change the user.)
sudo mysql -u root -p
It will prompt you for a password. just press return/enter key.
ALTER USER 'rt_user'@'localhost' IDENTIFIED BY 'your_new_rt_pass';

commit;
quit;
Although not covered in this guide, we recommend securing your MariaDB. Start with running the below script to setup up a min baseline.
sudo mysql_secure_installation
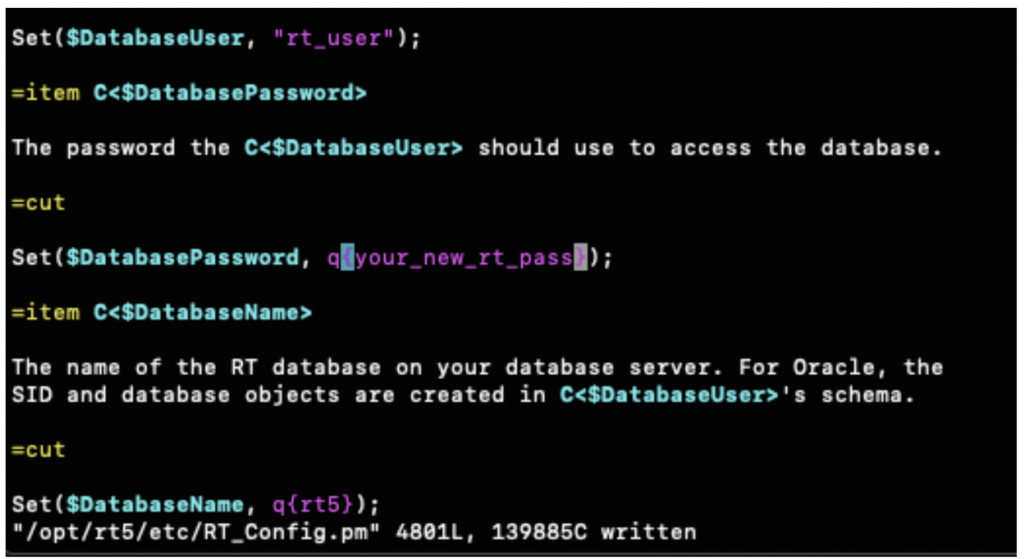
3.1.2 Update the RT_Config.pm config to reflect our password change we did for the RT database user rt_user.
sudo vi /opt/rt5/etc/RT_Config.pm
Edit the section as shown in Image-6 below
3.2 Confirm we have a working RT instance running with the standalone rt-server.
sudo /opt/rt5/sbin/rt-server --port 8080
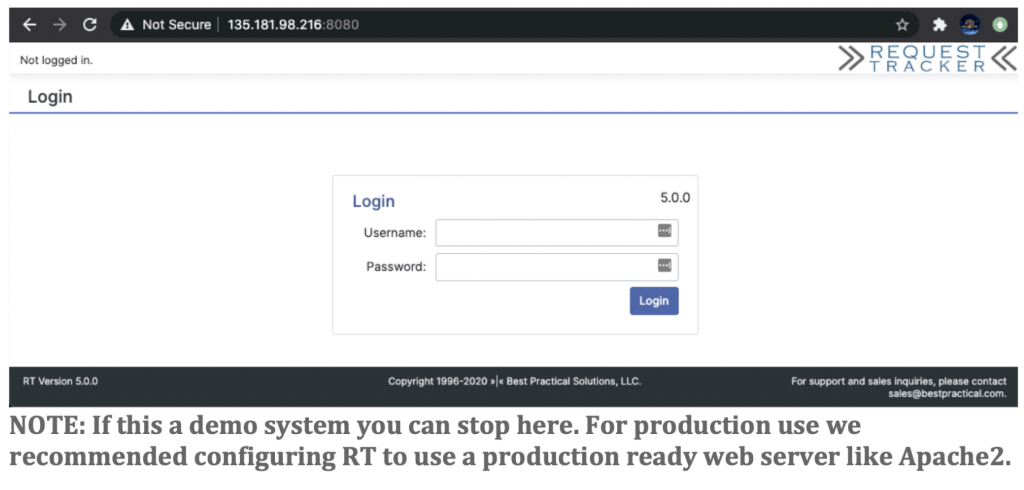
3.2.1 Open your web browser and navigate to your servers ip or FQDN and port 8080. For our demo server it is http://135.181.98.216:8080/. You should see the login page.
4. Configure RT5 to work with the Apache2 web server
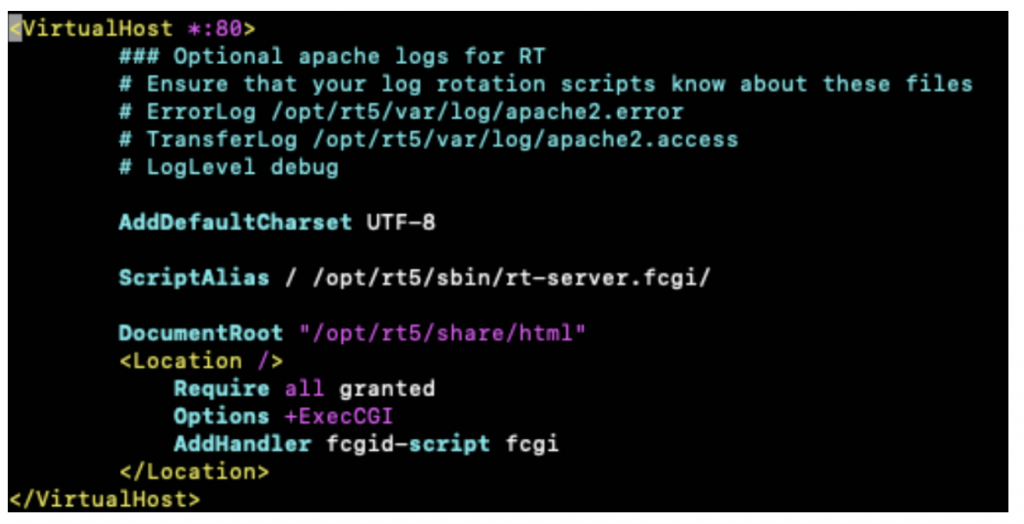
4.1 Create a RT5 sites-available configuration file.
sudo vi /etc/apache2/sites-available/rt5.conf
4.2 Populate the file you just created with the information below or pull it from: https://hendgrow.com/gitp/RT5/rt5.conf
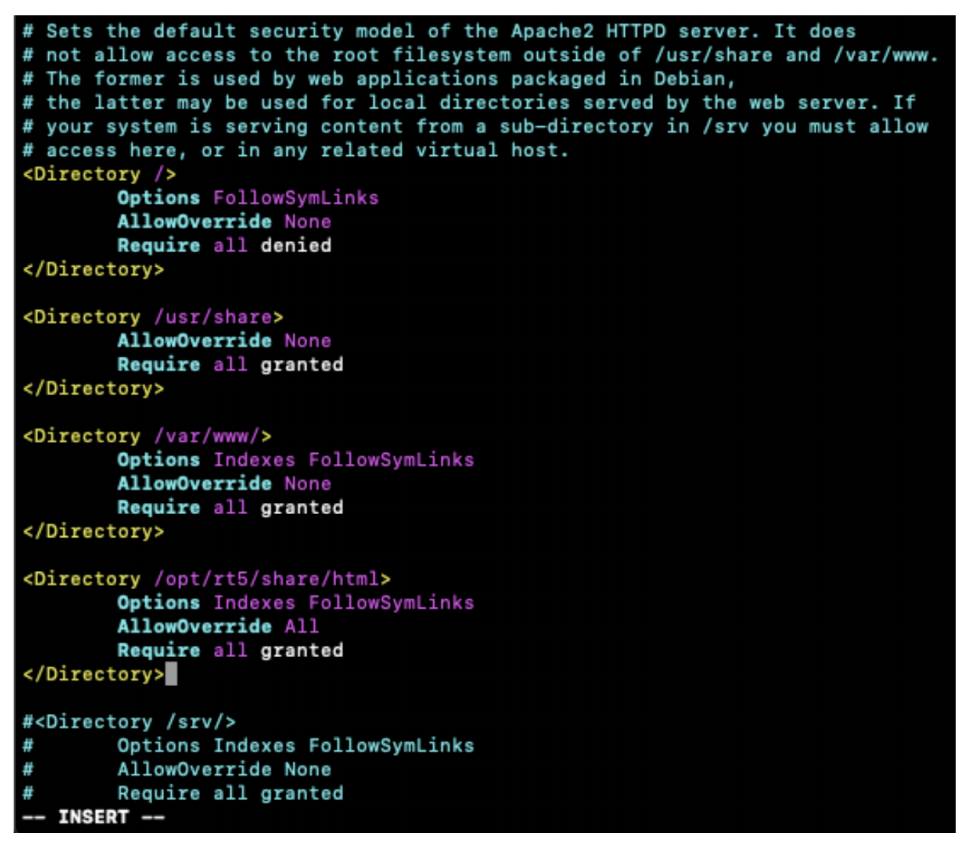
4.3 Edit the apache2.conf file and add information as shown in apache2.conf or pull it from: https://hendgrow.com/gitp/RT5/RT5_apache2.conf_add.txt
sudo vi /etc/apache2/apache2.conf
5. Enable the RT5 site
5.1 Enable the RT5 site
sudo a2ensite rt5
5.2 Disable the default site
sudo a2dissite 000-default
5.3 Restart Apache
sudo systemctl restart apache2
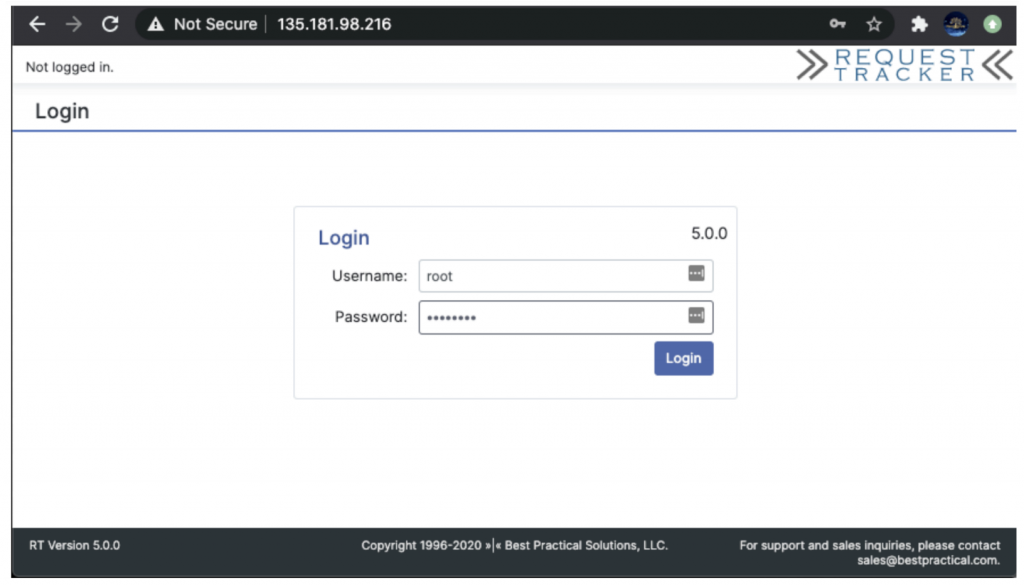
5.4 Open your web browser and navigate to your servers ip or FQDN. For our demo server it is http://135.181.98.216. You should see the login page. You should see the login page as shown in Image-7.
NOTE: The default credentials for RT5 are: User: root | Password: password Your first step once logged in is to change the root password! It is a SECURITY risk! The next step should be to setup https for this site using letsencrypt for example.
—End—
Other Topics added from YouTube comments and support@hendgrow.com
How to remove the “Possible cross-site request forgery” RT message when creating tickets or making changes via the WUI etc.

Edit the RT_SiteConfig.pm add an additional line to indicate your Webdomain either IP or FQDN.
Example below:
sudo vi /opt/rt5/etc/RT_SiteConfig.pm
Set( $WebDomain, 'your-servers-ip' );

Restart Apache
sudo systemctl restart apache2
There still allot to do, like configuring an RT email gateway, task scheduler, full text search and general system security etc. That’s potentially for a future guide should there be demand. This guide does not cover server / application hardening and security as it is a broad topic and not the aim of this guide. You should always harden your servers by default! Some useful links:
Secure your MariaDB installation – https://mariadb.com/kb/en/mysql_secure_installation/
Apache2 Security Tips – https://httpd.apache.org/docs/2.4/misc/security_tips.html
Ubuntu Security and Server hardening – https://ubuntu.com/security
Consider subscribing if you found this valuable! youtube.com/HendGrow