The HendGrow site & YouTube channel was created to share knowledge by sharing how-to guides, book reviews, general knowledge etc, with the aim to empower the reader, viewer with the information to implement various solutions on their own or gain knowledge on various topics. Maybe you wondering what that book or topics is about, could be looking for a free firewall solution to protect the family or business. Have decided to open a store and need an open source web or retail Point of Sale (POS) system. The HendGrow site and channel provides walk-throughs on these and various other topics. The topics are either directly from our subscriber requests or derived from solutions we have implemented, that we believe could add value to the community. It’s our way to give back and hopefully help a few people along the way. If only one person gets value out of the how-to / walk-through guides then to us the effort was worth it.
Book Summary
Book summary with main takeaways for books I have read and found valuable over the years. This list will grow in the future. Started with the books that launched my interest in investing.
[44] Help drive the direction of the HendGrow blog & channel
As we continue to evolve, we want to ensure that our content resonates with you and the general community that will benefit. That’s why we’ve decided to open up new avenues for collaboration and input through Patreon!
Patreon provides a platform for us to connect more intimately with our supporters and gives you a chance to play a direct role in shaping the future of the content we create that helps others. Like the one linked to this post.
Participate in polls, Q&A sessions, and discussions where your opinions will directly influence the content and direction of support documentation we create to support the greater community.
Visit our Patreon page here -> patreon.com/HendGrow
[43] Install and configure a Vulnerability Scanner for Small Networks
In this quick How-To guide we go through the steps we used to install and configure Vulnerability Scanner for our small network. The product we decided on was Nessus Essentials (formally Nessus Home) from Tenable. We decided on this product as its free to use up to 16 IP addresses per scanner and has many enterprise grade capabilities. We needed a product that could scan our 5-production servers for vulnerabilities. It helped us tremendously in December 2021 when log4j hit and will add value for the current spring4shell we are looking into.
More information on this product can be found on the tenable website. https://www.tenable.com/products/nessus/nessus-essentials
[42] How to configure RT5 & E-mail.
—Guide Start Here–
Configure mail account
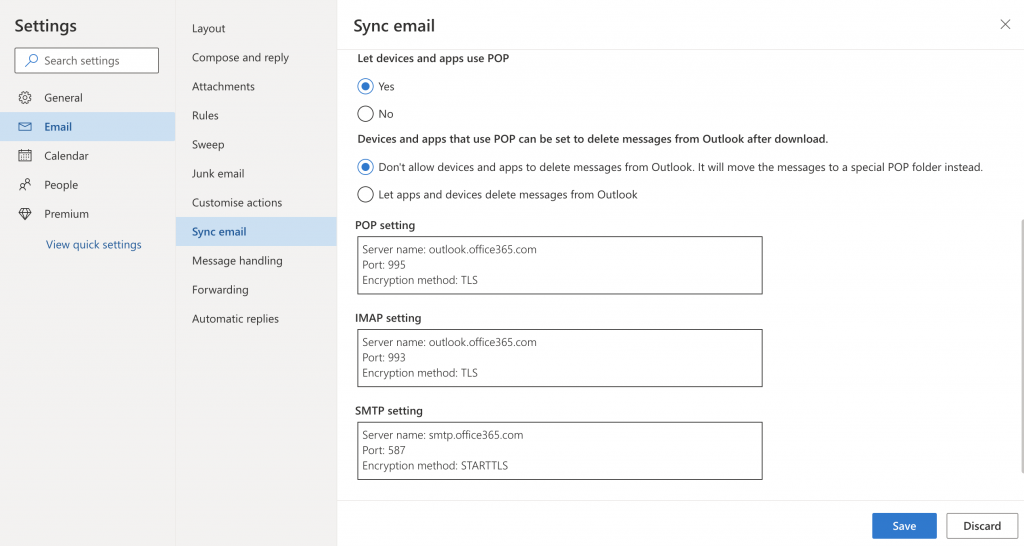
Navigate to Outlook.com and login or create a new account.
Once logged in, enable the account to use POP.
Settings -> Email -> Sync email. Set “Let devices and apps use POP” to yes.
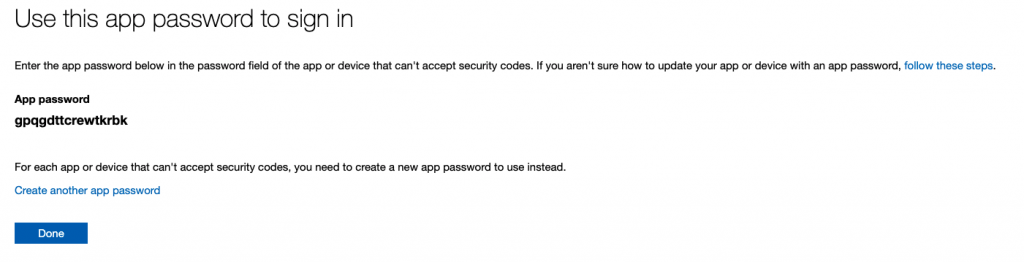
You will also need to provision an Application Password.
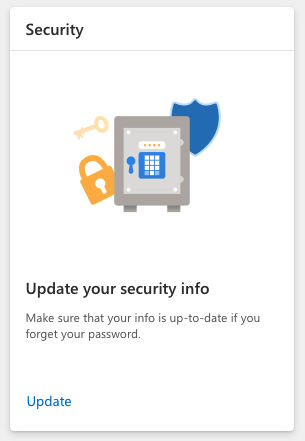
Select My Account
Then Security -> Update
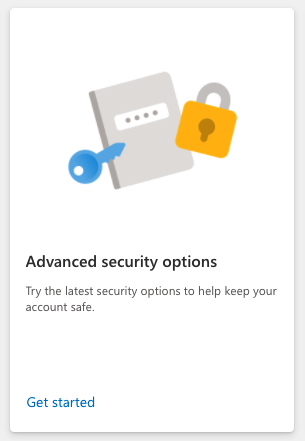
Advanced security options -> Get Started
App passwords -> Create a new app password

Copy your app password that was generated we will use this later in postfix and fetchmail
Install and configure Postfix
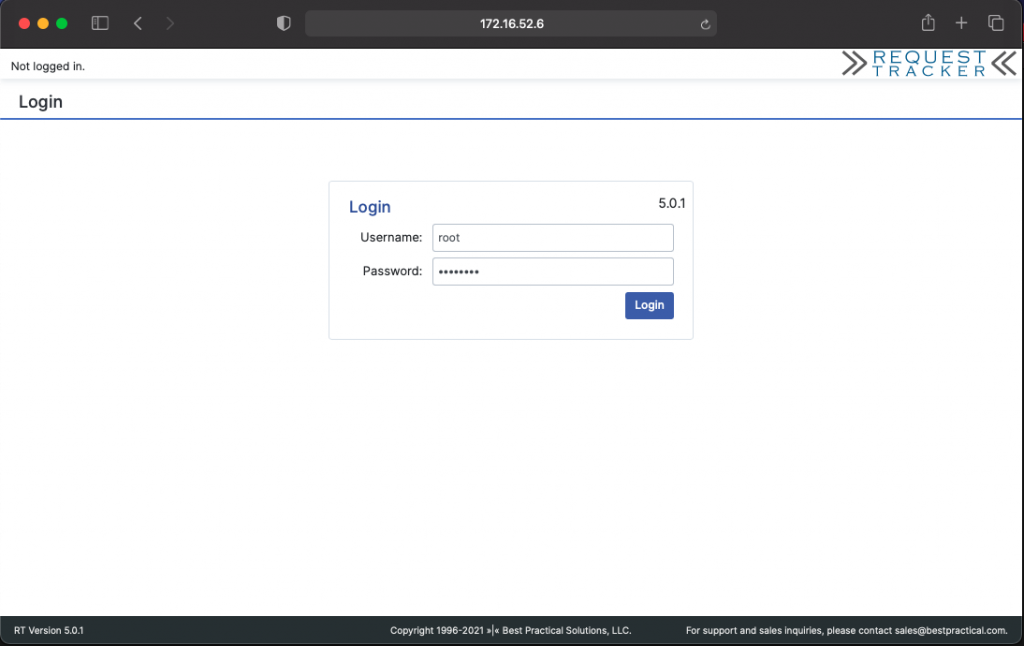
Now that the Outlook.com portion is sorted lets login to our RT5 server
ssh to your RT server
ssh hendgrow@172.16.52.6
Install Postfix
sudo apt-get install postfix
Select “Internet with smarthost”
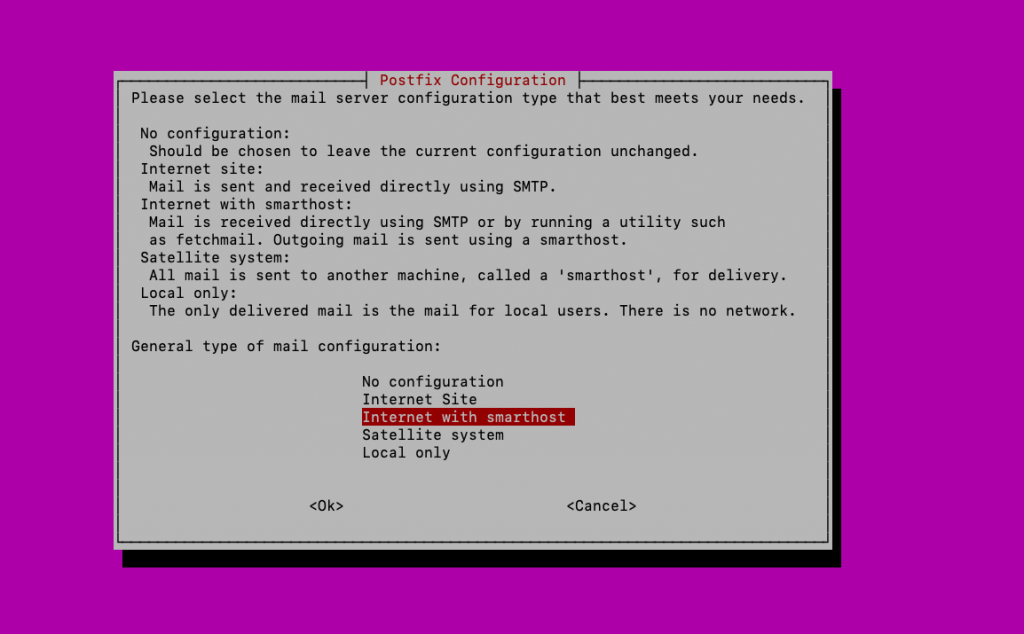
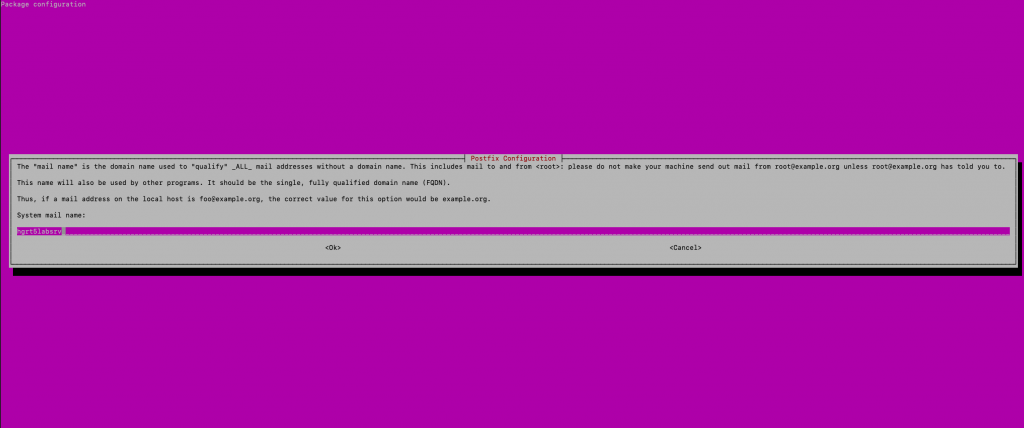
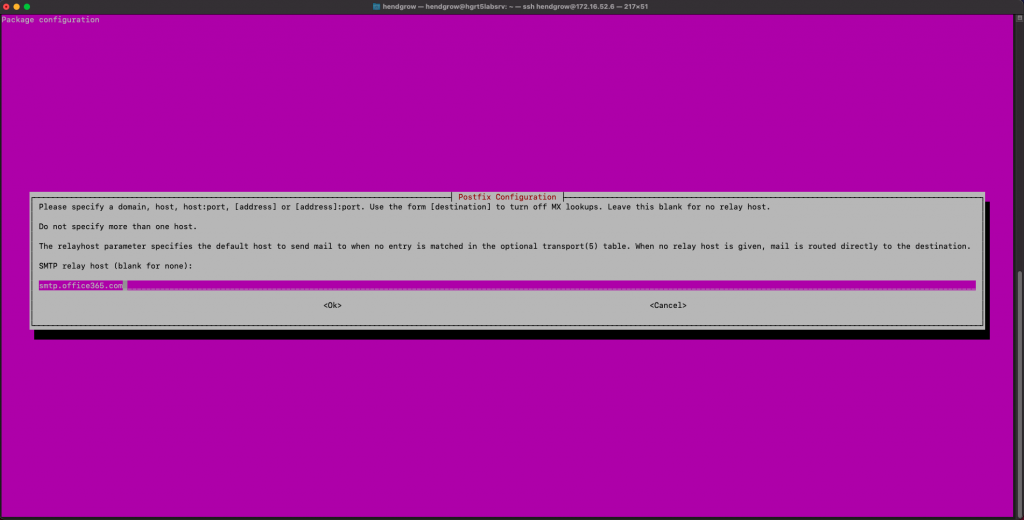
Enter the SMTP server for Outlook.com = smtp.office365.com
We now need to edit a few things for Postfix to work as expected by editing the main.cf file and add the below
Our config used during this how-to can be found here – > HendGrow_Sample_Main.cf
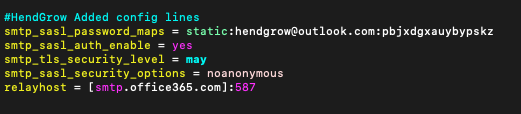
sudo vi /etc/postfix/main.cf
smtp_sasl_password_maps = static:hendgrow@outlook.com:pbjxdgxauybypskz
smtp_sasl_auth_enable = yes
smtp_tls_security_level = may
smtp_sasl_security_options = noanonymous
relayhost = [smtp.office365.com]:587
Restart Postfix for the changes to take
sudo service postfix restart
RT user creation and assign mail address.
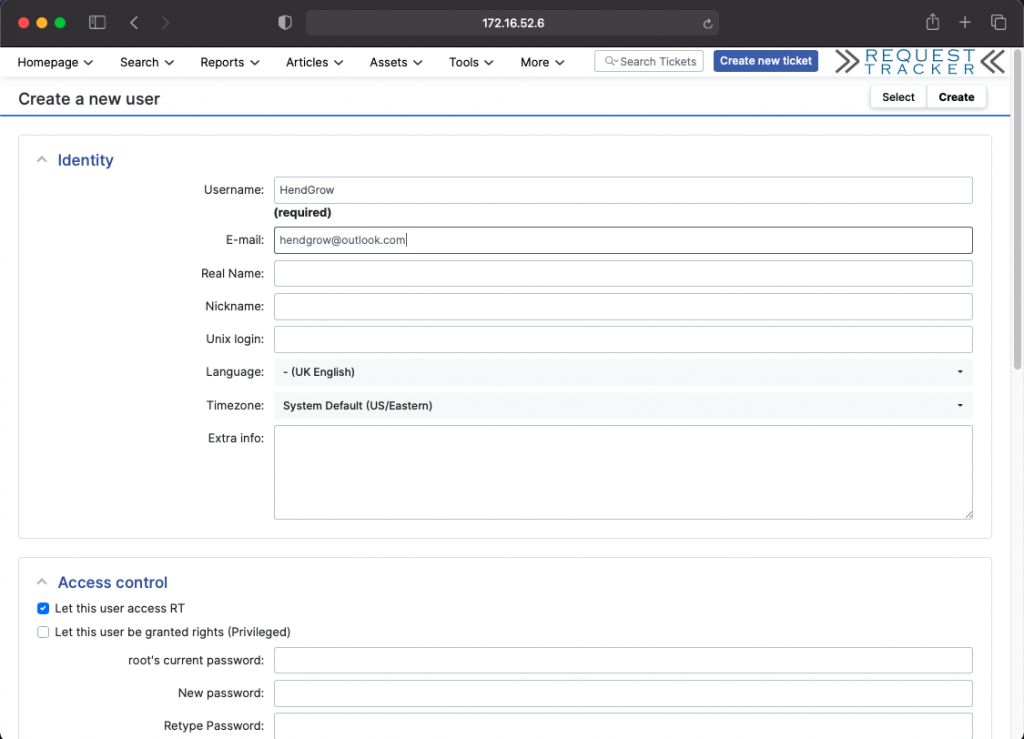
Login to RT and Create a new user for use with this email address. We will create user HendGrow that will be used to respond to support requests.
Login to your RT instance and create the support user /user as shown below
Admin -> Users -> Create
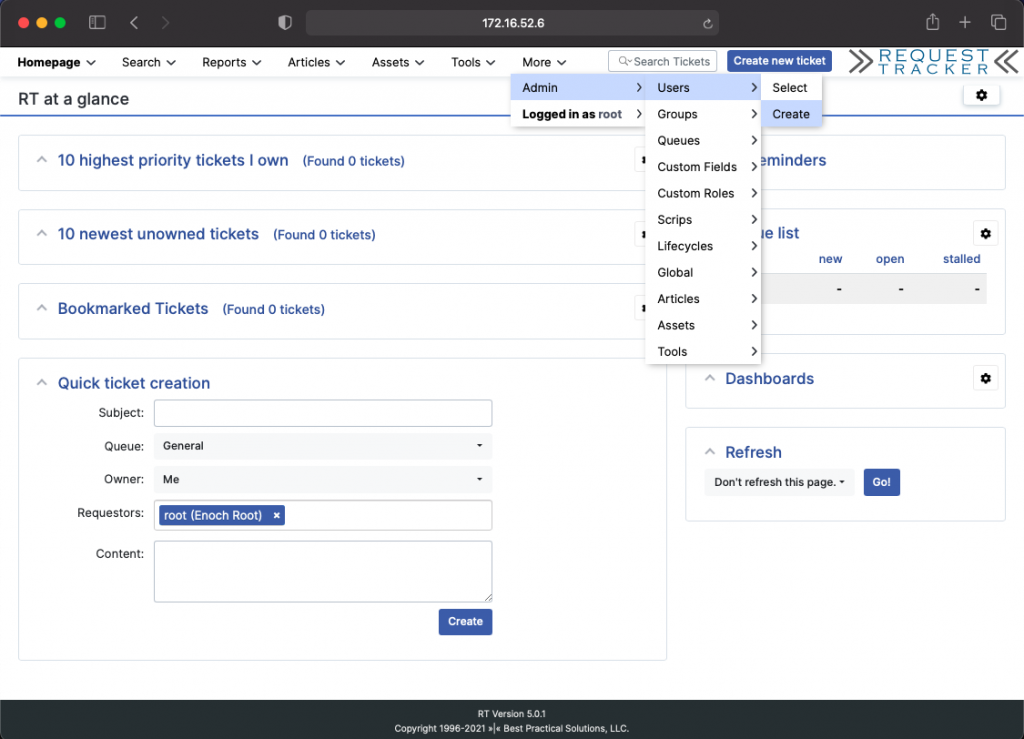
Under “E-Mail” capture the email address you wish to use. in our case it is hendgrow@outlook.com
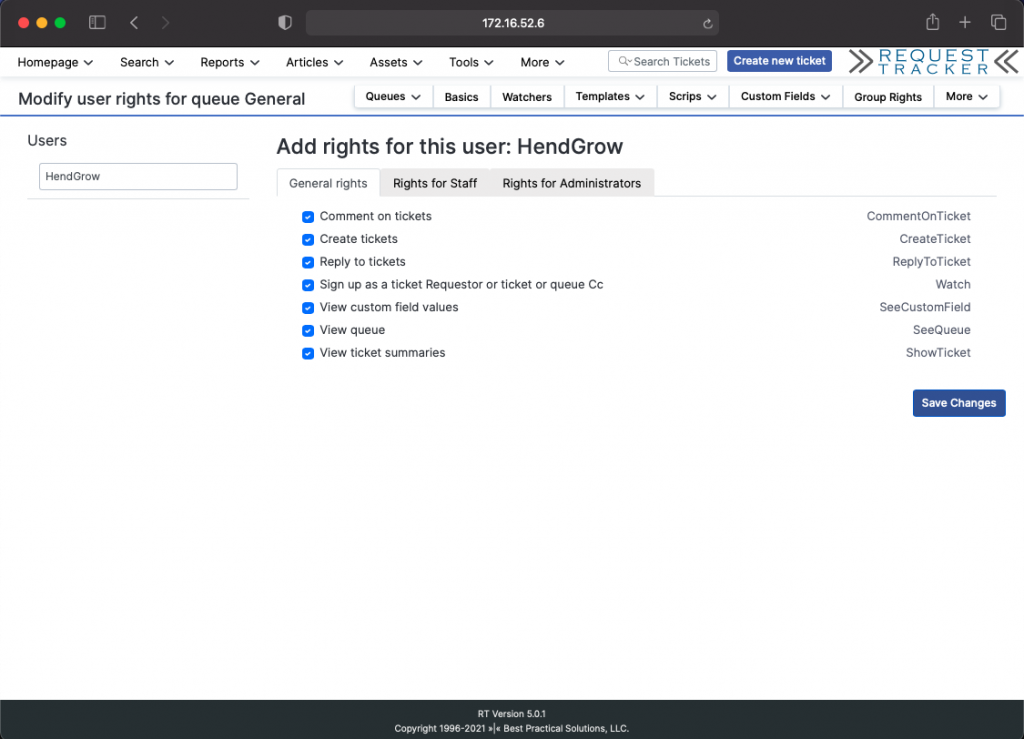
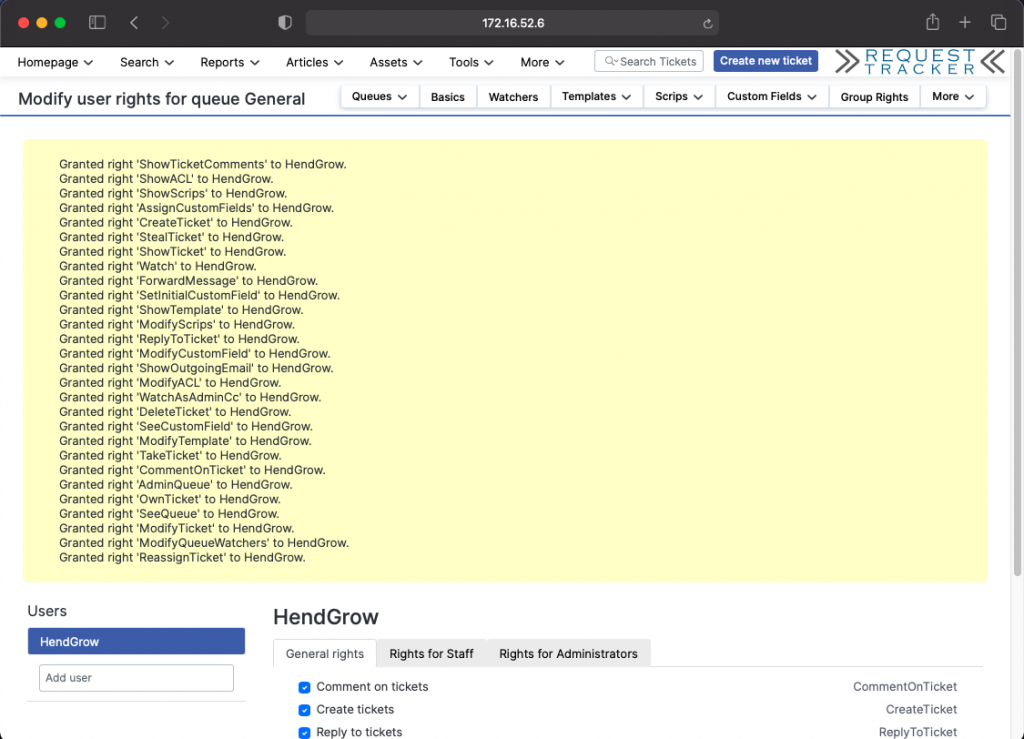
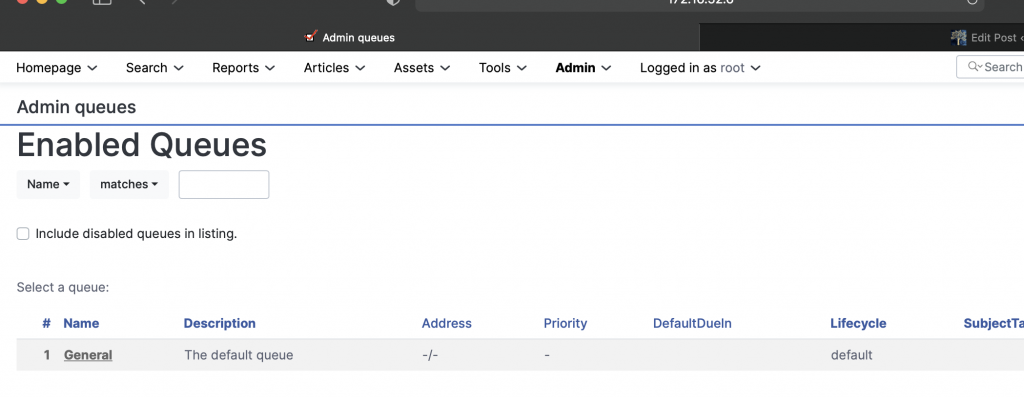
Grant permissions to General queue for the new support user.
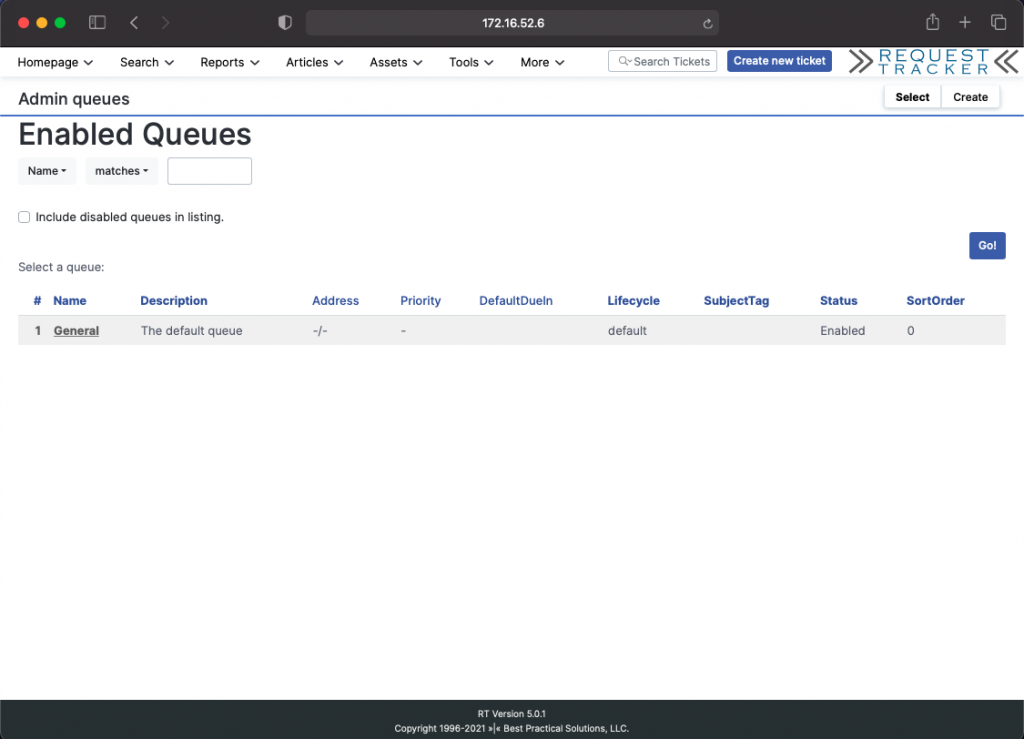
Admin -> Queues-> Select
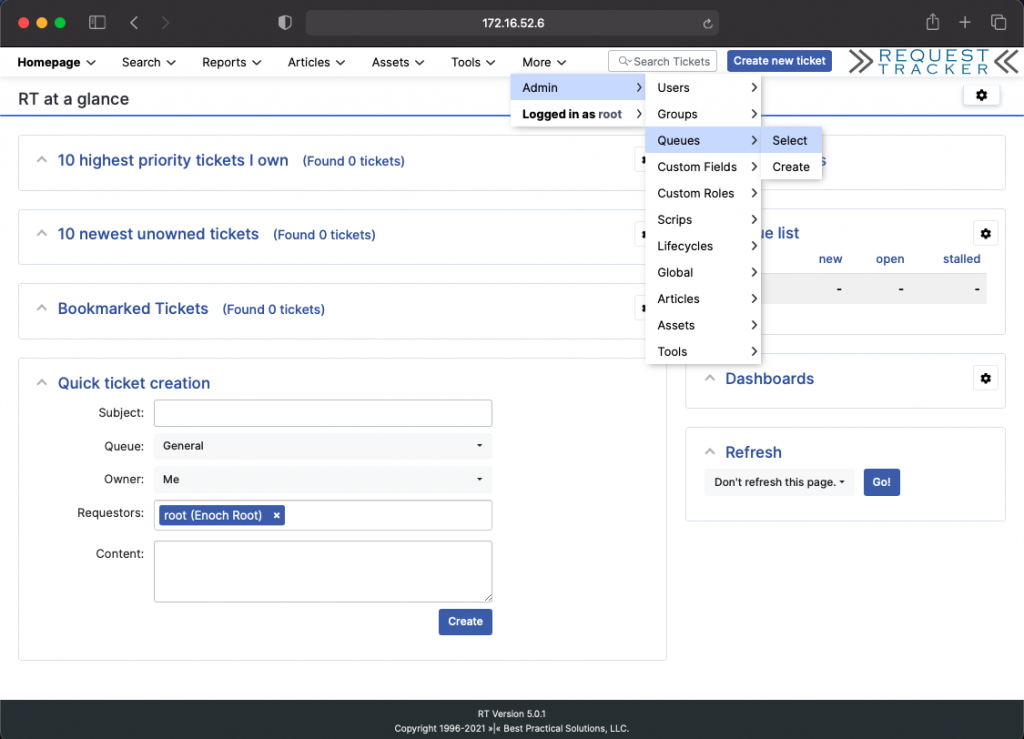
Select the General queue
Select User Rights
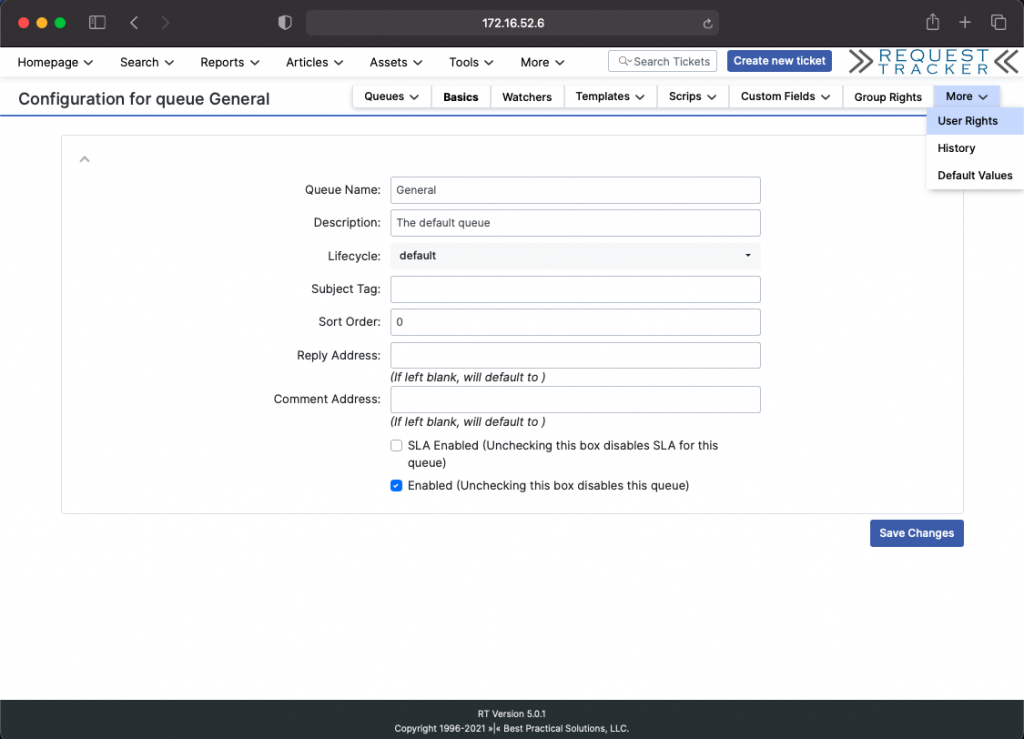
Select the user and assign the required permissions.
Apply changes by clicking Save Changes
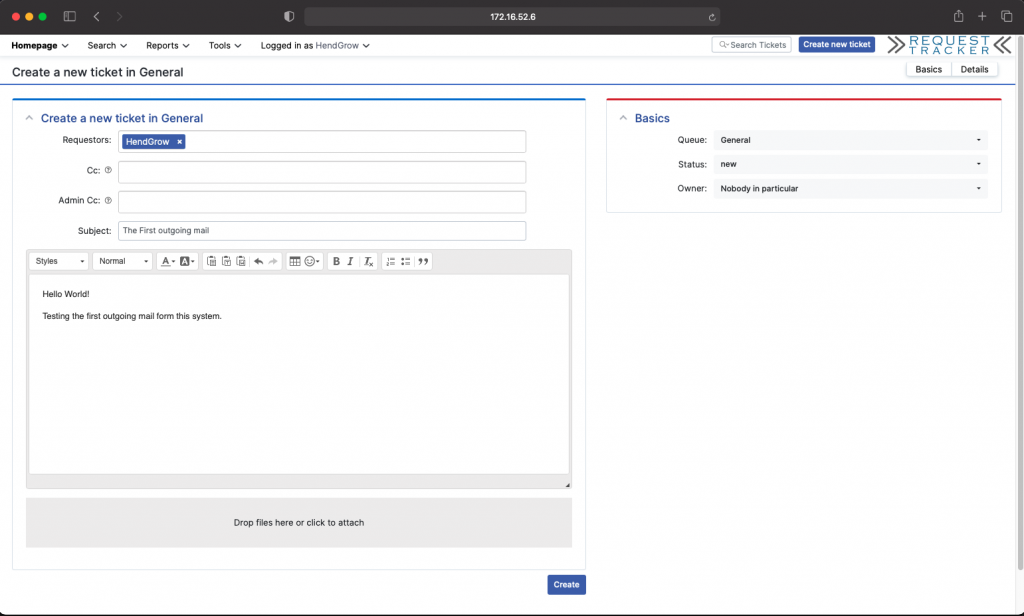
Testing outgoing mail
login as the support user you created in the previous step. Send a test mail to confirm postfix is working with office365.com by creating a new ticket.
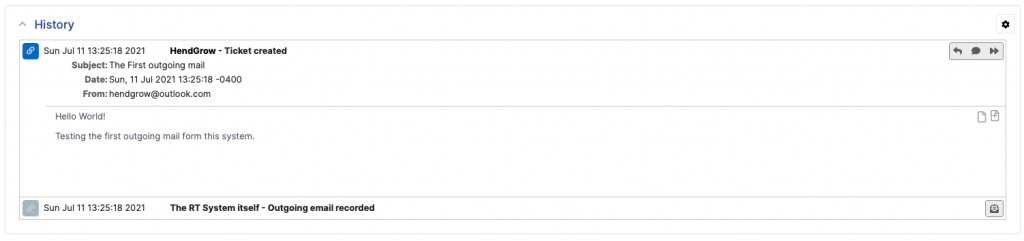
On the RT server check the /var/log/mail.log log file for any issues. You should get a response as below. we looking for the status=sent
tail -20f /var/log/mail.log

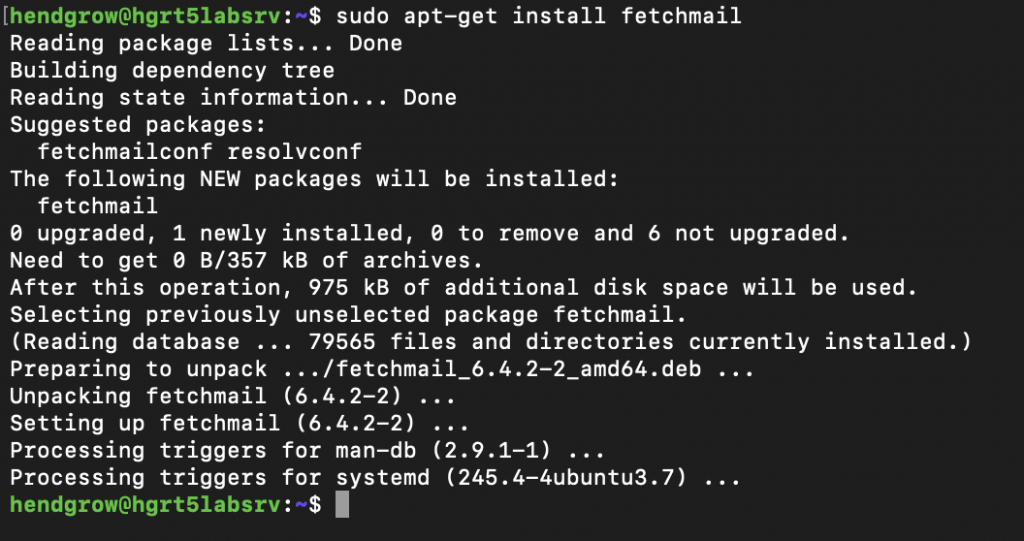
Installing and configuring Fetchmail
To enable RT to fetch mail from our mailbox and generate tickets we need to install fetchmail.
ssh to your RT server
ssh hendgrow@172.16.52.6
Install Fetchmail
sudo apt-get install fetchmail
Ensure that fetchamail is not running and create the fethcmailrc file.
sudo service fetchmail stop
sudo vi /etc/fetchmailrc
Our config used during this how-to can be found here – > fetchmailrc

Navigate back to RT and set create permissions for “Everyone” on the General Queue.
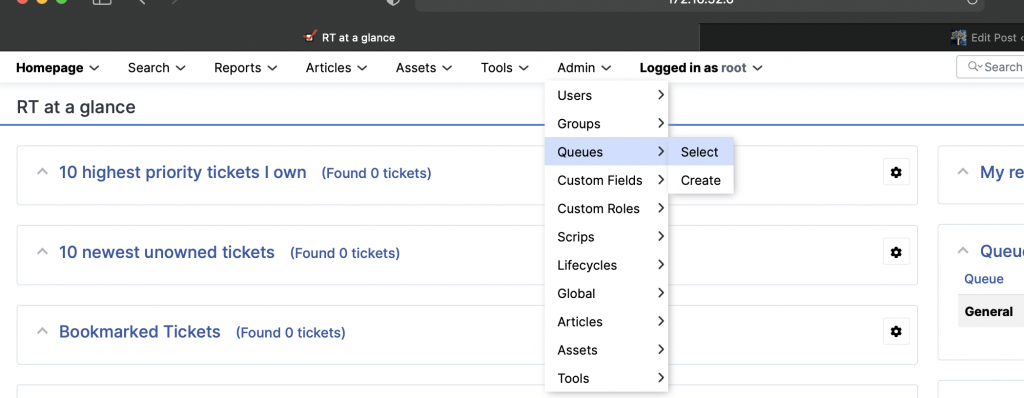
Admin -> Queues -> Select
Select General
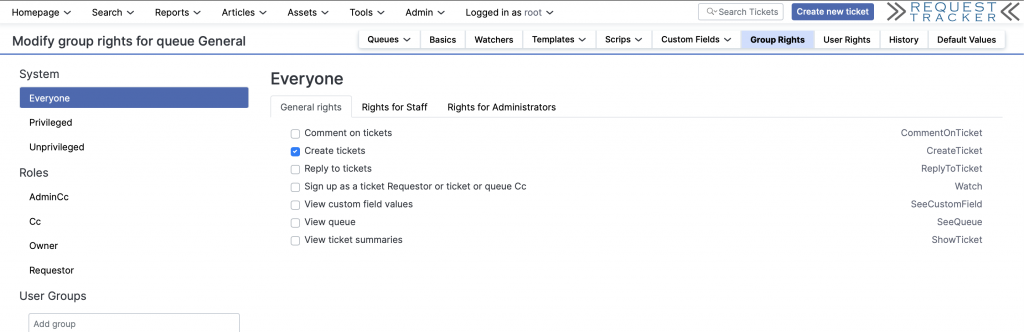
Grant Everyone “Create Tickets” rights.
Testing incoming mail and ticket generation.
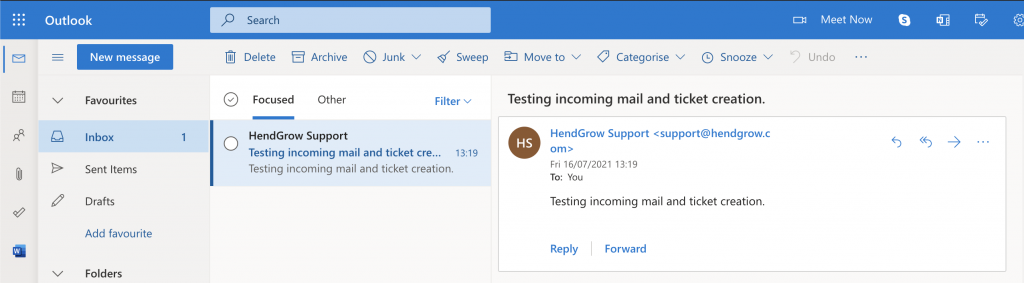
Send an email to the mailbox so fetchmail has content it can fetch. (We sent a mail from support@hendgrow.com to our mailbox hendgrow@outlook.com)
Set permissions and run fetchmail manually for the test.
sudo chmod 0700 /etc/fetchmailrc
sudo fetchmail -f /etc/fetchmailrc

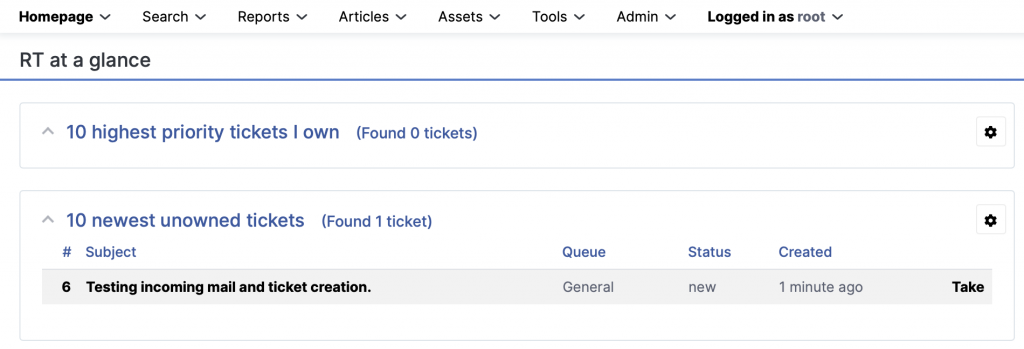
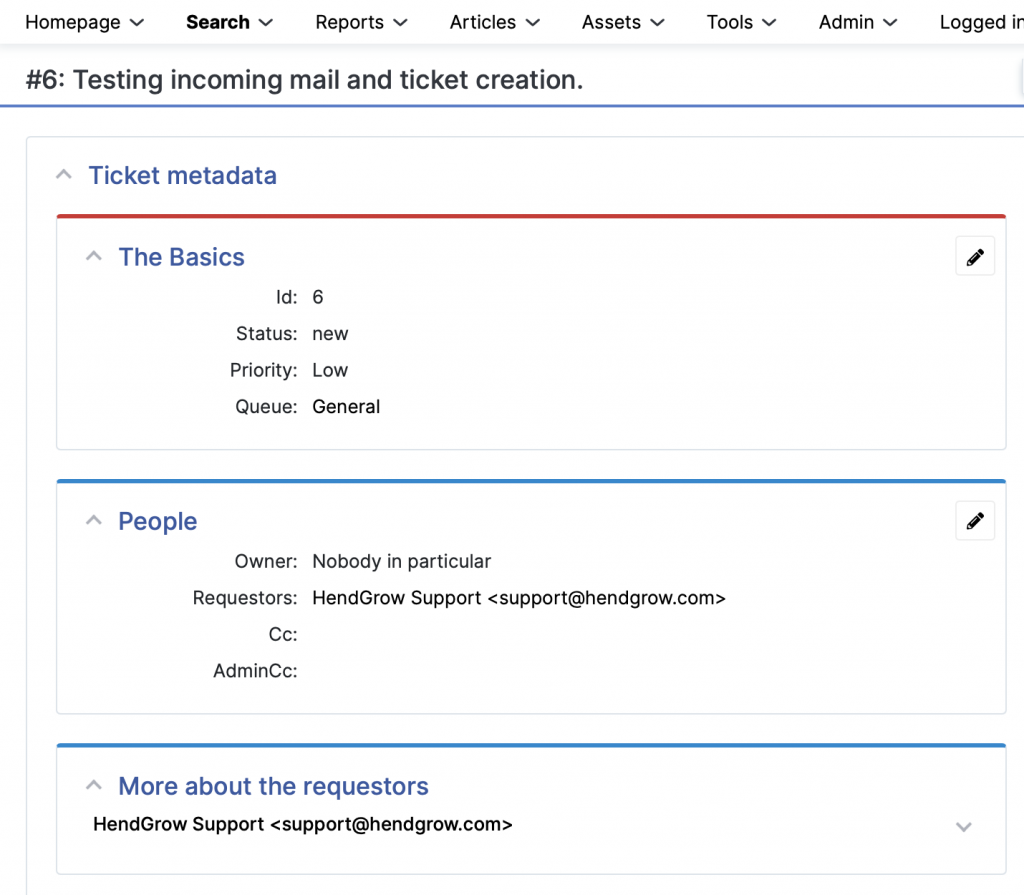
Login to RT and verify a new ticket has been created for the incoming email.
Edit the crontab to ensure fetchmail checks for new mail in the mailbox every 5min.
sudo crontab -e
Add the following line
*/5 * * * * fetchmail -f /etc/fetchmailrc
Your RT5 ticket system should now have the capability of sending and receiving emails for ticket creation and correspondence.
—Guide End Here–
[41] Installing Ubuntu 64-bit Server on a Raspberry Pi 4
In this quick How-To we go through the steps we use to install Ubuntu Server on a Raspberry Pi 4. We use these devices for many standard tasks on our network. As ubuntu is one of our prefered operating systems for servers. Decided to record the steps we go through while preparing a new Raspberry Pi 4 that will run ubuntu 64 bit server in the environment.
Raspberry Pi Imager: https://www.raspberrypi.org/downloads/
Ubuntu for Raspberry Pi: https://ubuntu.com/raspberry-pi
[40] Walk through – Camera SD Card picture recovery using Ubuntu and Foremost.
I deleted the images from my cameras SD card as I knew I had downloaded the images prior. What I did not know at the time was that one of my family members took additional photos! I now needed to find a way to recover these images. Well I did manage to recover all the photos. After this ordeal thought it would be valuable to share the process I used to recover data with the community. Hope you get value out of this walk through! 😉
—Guide Start Here–
Foremost Installation
$ sudo apt-get install foremost
Create the disk image of the SD Card using DD
$sudo dd if=/dev/mmcblk0p1 of=/home/hendgrow/file_recovery/images/Camera_SDCard.img status=progress
Using Foremost to recover the images from the SD card image we just created.
$ sudo foremost –t png,jpg –i /home/hendgrow/file_recovery/images/Camera_SDCard.img
Need to change the folder and file permissions as we executed the command as root.
$ sudo chown –R hendgrow:hendgrow /home/hendgrow/file_recovery/output/putput/
Thats It
—End—
Common file carving tools that might be of interest:
Foremost
http://foremost.sourceforge.net/
PhotoRec
https://www.cgsecurity.org/wiki/PhotoRec
TestDisk
https://www.cgsecurity.org/wiki/TestDisk
Scalpel
https://github.com/sleuthkit/scalpel
[39] How to Install MediaWiki on Raspberry-Pi
—Walk Through Starts Here—
SSH to your Raspberry Pi
ssh pi@your-ip-address
Ensure the Raspberry-Pi is up-to-date
sudo apt updatesudo apt upgrade
Install the LAMP Stack on the Raspberry Pisudo apt-get install apache2 mariadb-server php php-mysql libapache2-mod-php php-xml php-mbstring php-apcu php-intl imagemagick inkscape php-gd php-cli php-curl php-bcmath git
sudo service apache2 reload
Download and extract MediaWiki
You can find the latest version here -> https://www.mediawiki.org/wiki/Download
As of writing this, the latest version is 1.36.1
cd /tmp/
wget https://releases.wikimedia.org/mediawiki/1.36/mediawiki-1.36.1.tar.gz
tar -xvzf /tmp/mediawiki-*.tar.gz
sudo mkdir /var/lib/mediawiki
sudo mv mediawiki-*/* /var/lib/mediawiki
sudo ln -s /var/lib/mediawiki /var/www/html/mediawiki
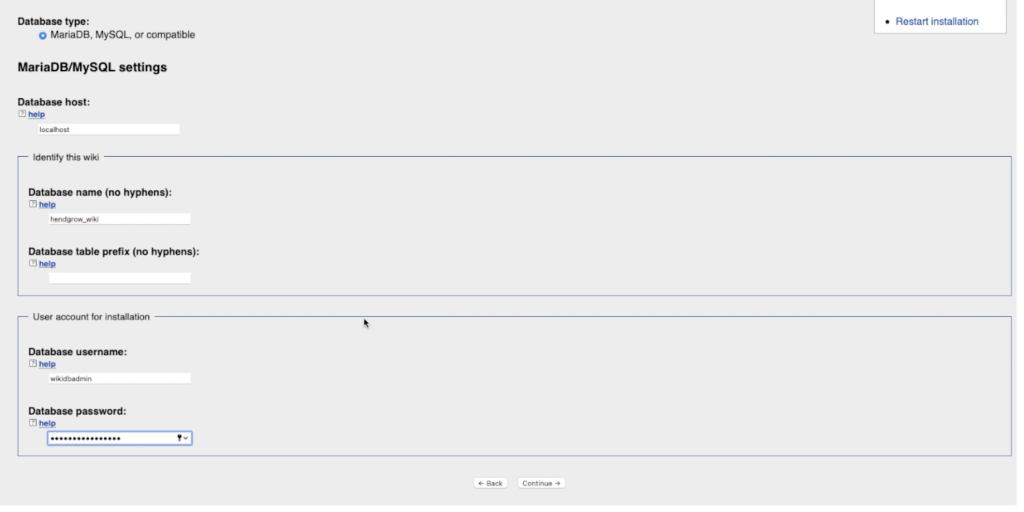
Configuring the MariaDB Database
sudo mysql -u root -p
Note: If you have not configured password it will be blank, so just press enter.
Create the Usermysql> CREATE USER 'wikidbadmin'@'localhost' IDENTIFIED BY 'YourPasswordHere';
Create the Databasemysql> CREATE DATABASE hendgrow_wiki;
mysql> use hendgrow_wiki;
Give the new user access to the new databasemysql> GRANT ALL ON hendgrow_wiki.* TO 'wikidbadmin'@'localhost';
mysql> commit;
mysql> quit;
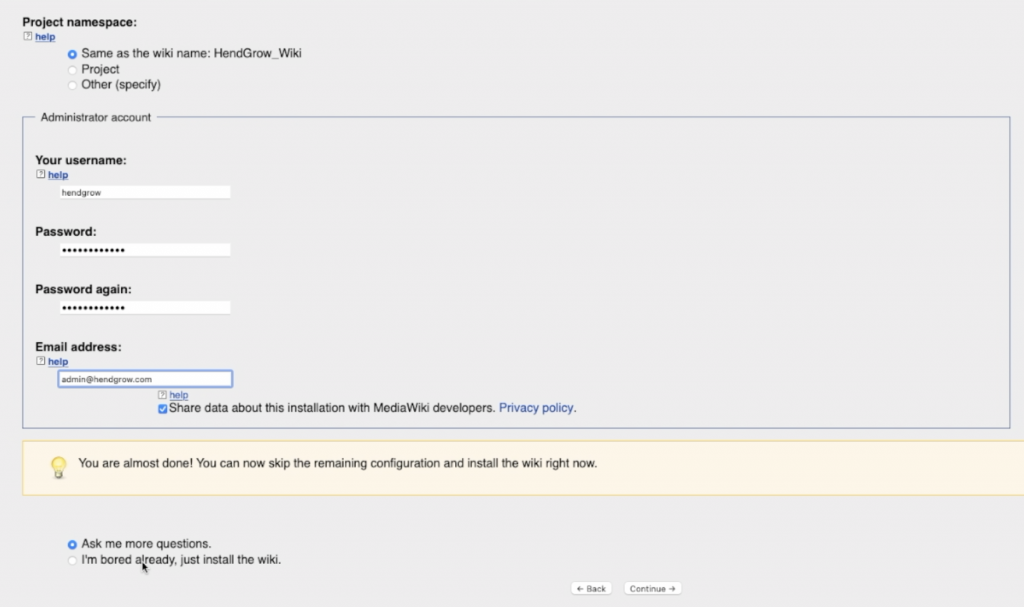
Open your web browser and navigate to your server
Example: http://your-ip-address/mediawiki/
Our example: http://192.168.2.200/mediawiki/
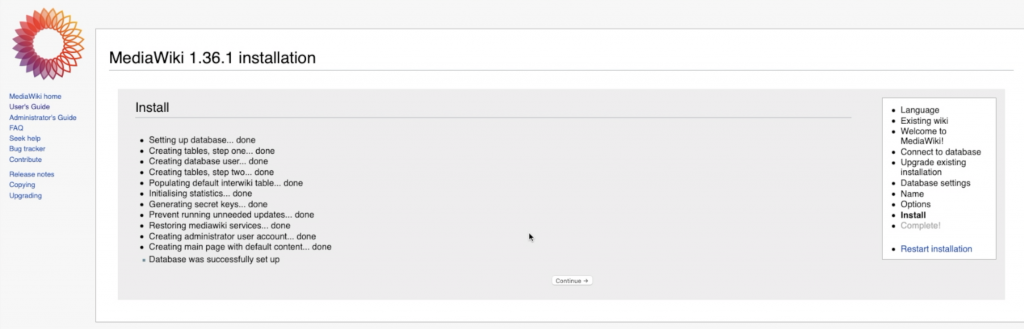
You should see the following:

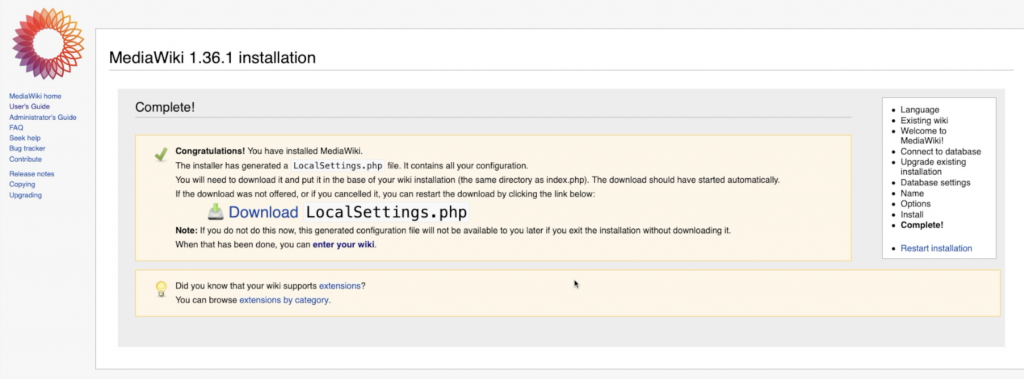
Download the “Localsettings.php” and copy it to your servers base wiki installation folder.
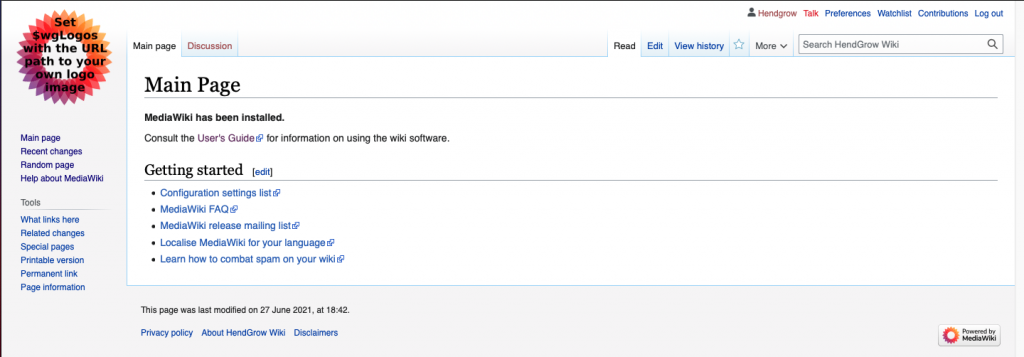
Refresh your browser. you should see page below.
[38] How to run QRadar Community Edition 7.3.3 on QEMU/KVM – OpenSUSE Leap 15.2
Walk through requested by kiraitachi on how to run QRadar Community Edition 733 on QEMU/KVM.
The guide used in this tutorial can be found in the YouTube description section of the video guide.

[37] We replaced our HIDS solution with WAZUH and have not looked back.
Steps for installing WAZUH all in one instance. These are the steps we used including the steps for installing the agents on Linux, windows and macOS / OSX.
The back story for the guide is we used OSSEC for many years and our setup worked fine with sending the OSSEC events to a syslog server for additional reporting. We decided to move to WAZUH as it has a nice interface and reporting. Also the installation and management of the solution is straight forward and simple to use. We have subsequently convinced and started to migrate some of our clients to WAZUH with great results and positive feedback. We therefore decided to put this quick guide together to provide our clients and the community a quick reference to deploy their own standalone instance should they want to. The all in one install we deployed can support up to +/- 100 agents.
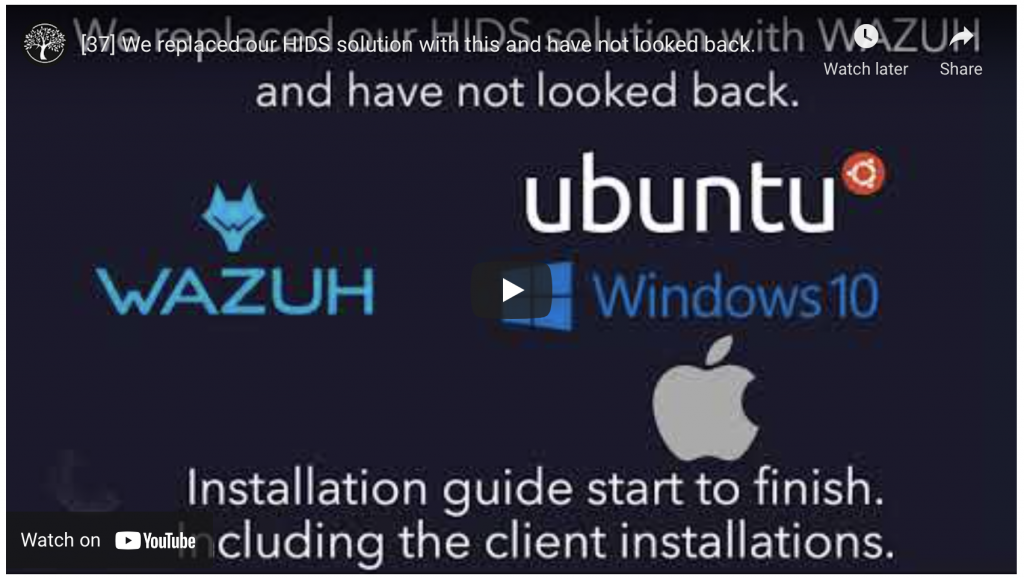
- - - - - START HERE - - - - - PDF version Min recommendations & specs we used (we have 20 agents in our environment) Ubuntu Server 20.06 2x CPU 6 GB RAM 250 GB HDD NIC - - - - - ssh to your Ubuntu Server instance.ssh yourusername@yourserveripSet root passwordsudo passwdEnter the new root password Confirm the new root passwordsuEnter the password you just set. Install WAZUHapt-get install libcap-ng-utils unzip curl -so ~/all-in-one-installation.sh https://raw.githubusercontent.com/wazuh/wazuh-documentation/4.0/resources/open-distro/unattended-installation/all-in-one-installation.sh && bash ~/all-in-one-installation.shOpen your web browser and navigate to your servers ip https://yourseversipaddress or FQDN Adding agents Note you need to substitute your server FQDN or IP address where we have yourserver Linux (Ubuntu 20.04 Desktop) Open the terminal and run the following commandssudo apt-get install curl sudo curl -so wazuh-agent.deb https://packages.wazuh.com/4.x/apt/pool/main/w/wazuh-agent/wazuh-agent_4.0.4-1_amd64.deb && sudo WAZUH_MANAGER='yourserver' dpkg -i ./wazuh-agent.debStart the agentsudo service wazuh-agent startWindows Open the powershell ISE as administrator and run the following commandInvoke-WebRequest -Uri https://packages.wazuh.com/4.x/windows/wazuh-agent-4.0.4-1.msi -OutFile wazuh-agent.msi; ./wazuh-agent.msi /q WAZUH_MANAGER='yourserver' WAZUH_REGISTRATION_SERVER='yourserver'Mac Open the terminal and run the following commandcurl -so wazuh-agent.pkg https://packages.wazuh.com/4.x/macos/wazuh-agent-4.0.4-1.pkg && sudo launchctl setenv WAZUH_MANAGER 'yourserver' && sudo installer -pkg ./wazuh-agent.pkg -target /Start the agentsudo /Library/Ossec/bin/ossec-control start- - - - - EnD - - - - -
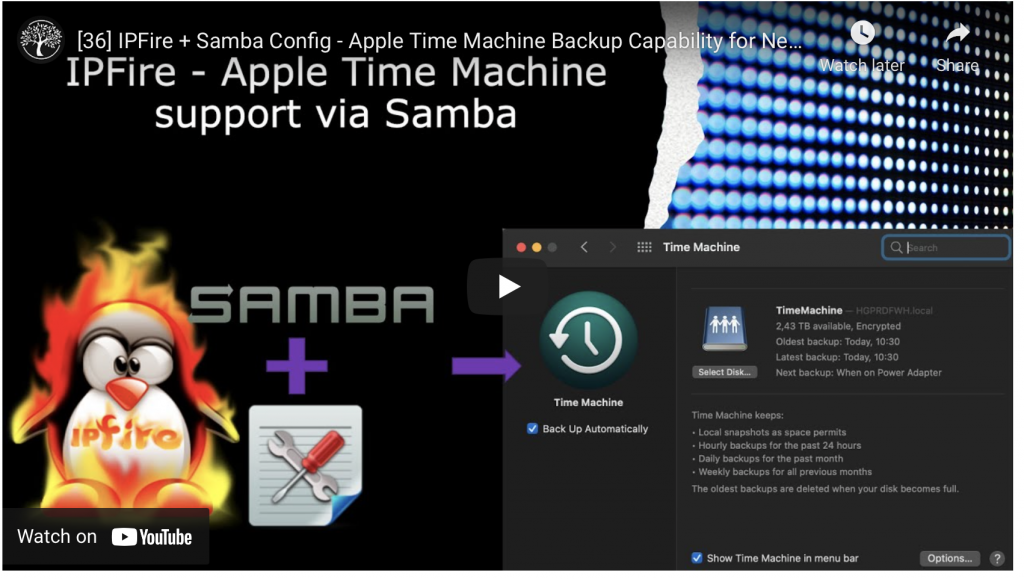
[36] IPFire + Samba Config – Apple Time Machine Backup Capability for Network and VPN users.
The guide or steps used in this tutorial can be found in the YouTube description section of the video guide.
As requested by one of our subscribers. We put together this guide on : – How to attach then format an external USB disk. – Install the samba server role and create a network file share that supports Apple Time Machine backups on IPFire. This enables users on the network / VPN to use Apple Time Machine with the share on IPFire as the destination disk. Removing the reliance on USB drives for backups. This will be the last guide regarding Samba and Time Machine as we have covered it per subscriber requests in other guides also.