During this walk-through we will demonstrate how in download and install QRadar CE 7.3.3. via the OVA file provided by IBM. QRadar CE is a fully-featured free version of QRadar that includes a limited 50 events per second (EPS) & 5000 network flows a minute (FPS) perpetual license. It is the perfect solution to start learning QRadar or use it to monitor your home network.
*Q1 LABS, QRADAR and the ‘Q’ Logo are trademarks or registered trademarks of IBM Corp. Trademarks and related content are owned by their respective companies / owners.
—START— QRadar 733 Steps
1. Download the OVA from – https://developer.ibm.com/qradar/ce/
2. Double click on the OVA file you just downloaded to kick of the import to VirtualBox.
3. Initial login. User = root. / Password = password
4. When prompted enter your chosen password and confirm for the password change.
5. Type in ./setup.sh to kick off the install.
6. Accept the terms by pressing Enter.
7. Enter password of your choice for the web interface.
8. Open a compatible web browser and input the IP of your QRadar CE Server, In our example – “https://192.168.68.141”
This walk-through guides you through the process of Installing the world class, industry tested ticket system known as Request Tracker or RT. We start with a solid Ubuntu 20.04 base as the server combined with Perl, MariaDB for the Database and Apache2 as the web server.
2.2 Extract / unpack the file to /tmp and run the ./configure script provided.
tar xzvf rt-5.0.1.tar.gz -C /tmp
cd /tmp/rt-5.0.1/
sudo ./configure
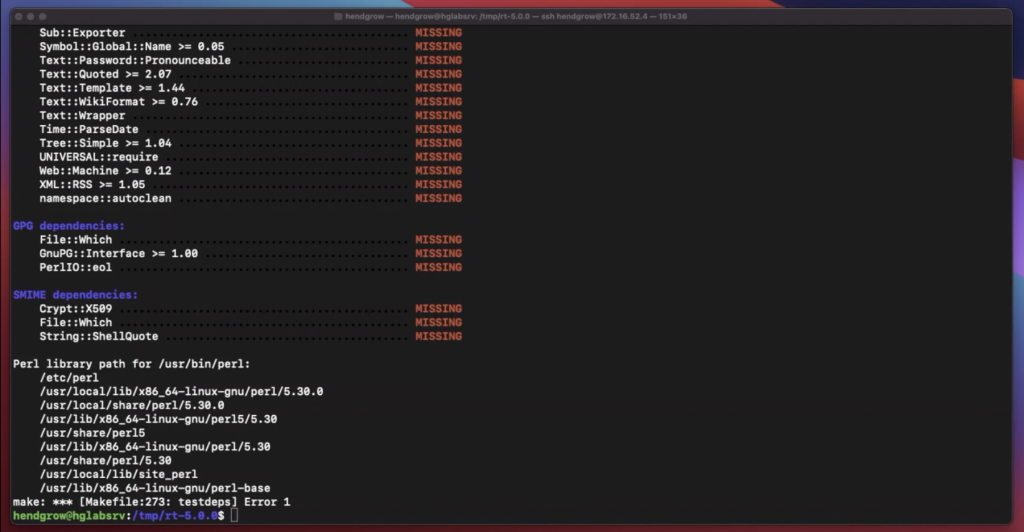
2.3 Ensure the required Perl and system libraries are installed with the command below.
sudo make testdeps
2.2.1 If the script reports any missing dependencies as shown image Image-1 below run the fixdeps command.
sudo make fixdeps
Image-1
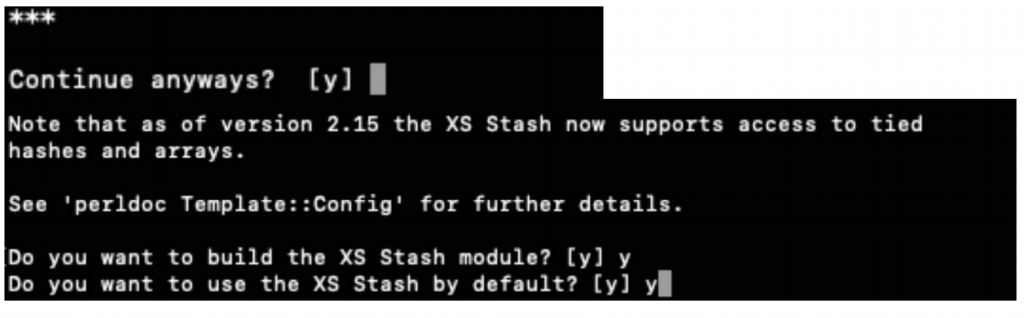
2.2.3 During our demo install we were promoted with the following three questions as shown in Image-3 while running the fixdeps script. We opted to answer yes.
Image-2
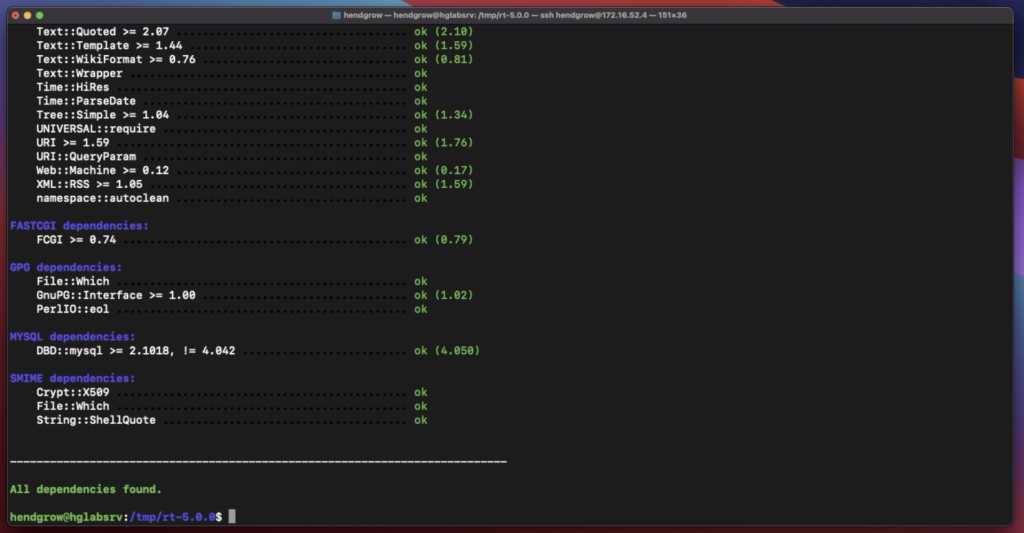
Once the fixdeps script is complete, validate all dependencies are present by running the testdeps script to confirm. If successful you should see similar out put as Image-3 below
sudo make testdeps
Image-3
2.3 Run the make install with appropriate permissions to install RT5
sudo make install
3 Initialise the Database for RT5
sudo make initialize-database
It will prompt you for a password. just press return/enter key.
Note: Only if the initialization fails run make dropdb and then re-run make initialize-database.
Once completed successfully you should see same result as shown in Image-4
Image-4
3.1.1 Change the default password for the RT database user. (We recommend for production systems to also change the user.)
sudo mysql -u root -p
It will prompt you for a password. just press return/enter key.
ALTER USER 'rt_user'@'localhost' IDENTIFIED BY 'your_new_rt_pass';
commit;
quit;
Although not covered in this guide, we recommend securing your MariaDB. Start with running the below script to setup up a min baseline.
sudo mysql_secure_installation
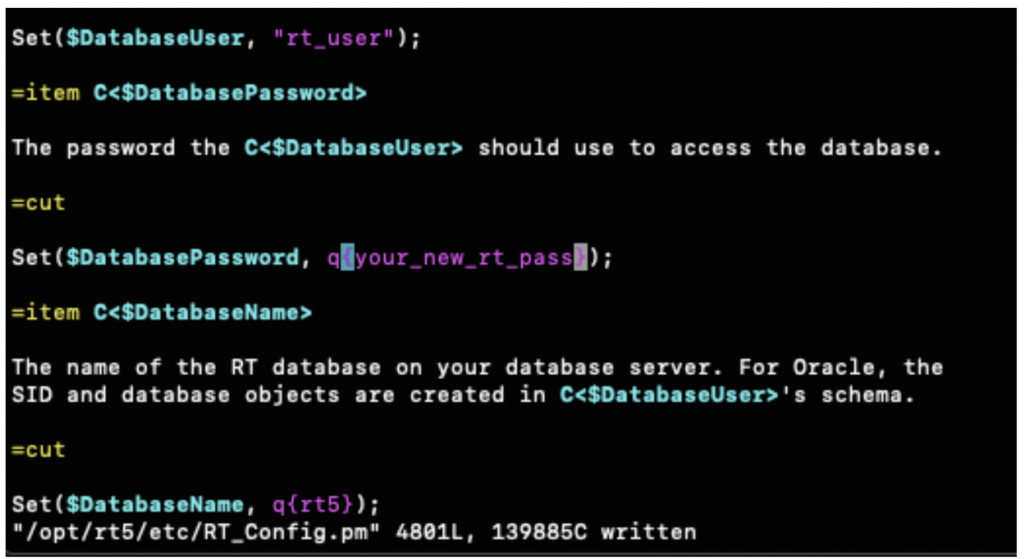
3.1.2 Update the RT_Config.pm config to reflect our password change we did for the RT database user rt_user.
sudo vi /opt/rt5/etc/RT_Config.pm
Edit the section as shown in Image-6 below
Image-6
3.2 Confirm we have a working RT instance running with the standalone rt-server.
sudo /opt/rt5/sbin/rt-server --port 8080
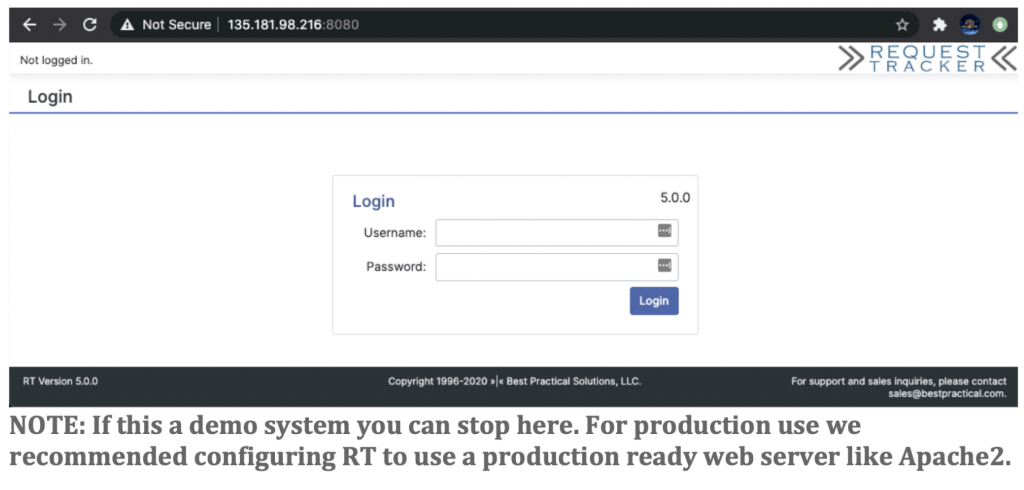
3.2.1 Open your web browser and navigate to your servers ip or FQDN and port 8080. For our demo server it is http://135.181.98.216:8080/. You should see the login page.
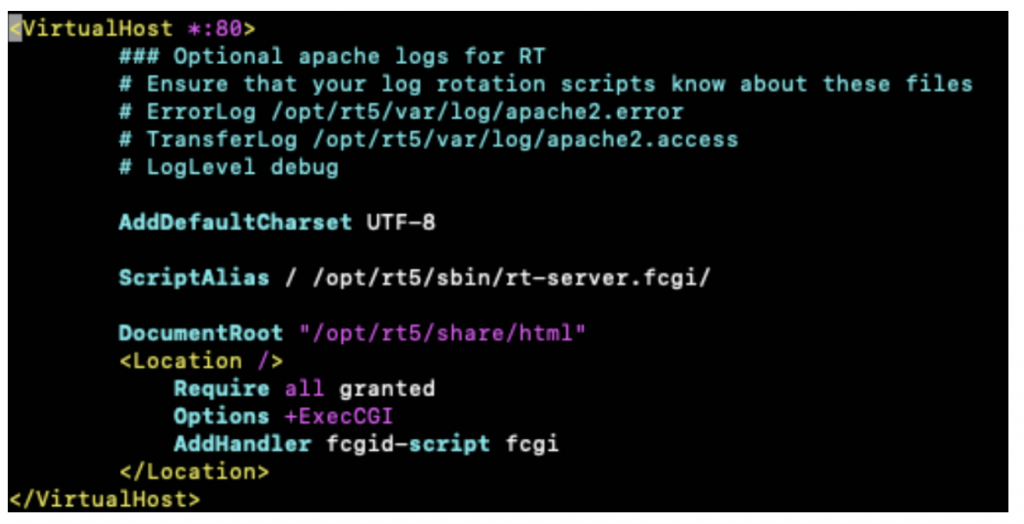
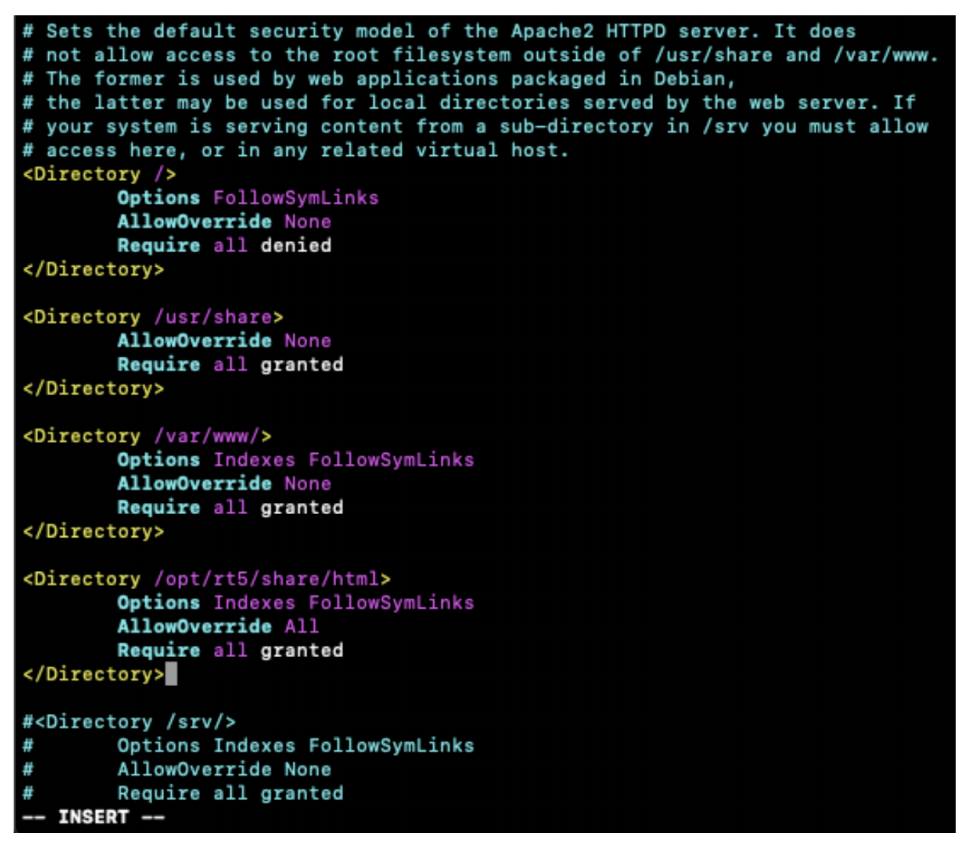
4. Configure RT5 to work with the Apache2 web server
4.1 Create a RT5 sites-available configuration file.
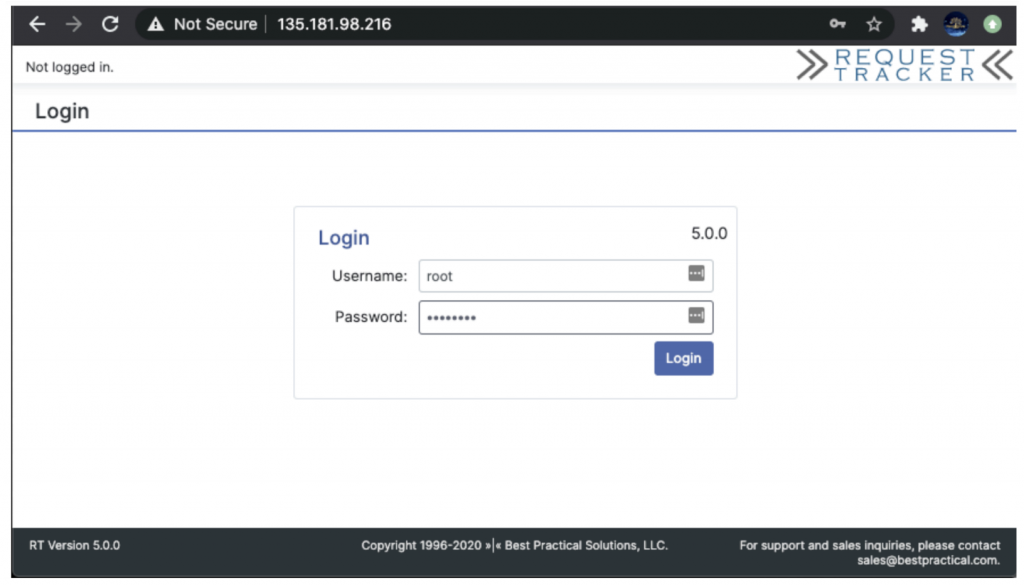
5.4 Open your web browser and navigate to your servers ip or FQDN. For our demo server it is http://135.181.98.216. You should see the login page. You should see the login page as shown in Image-7.
Image-7
NOTE: The default credentials for RT5 are: User: root | Password: password Your first step once logged in is to change the root password! It is a SECURITY risk! The next step should be to setup https for this site using letsencrypt for example.
How to remove the “Possible cross-site request forgery” RT message when creating tickets or making changes via the WUI etc.
Possible Cross-site request forgery message RT5
Edit the RT_SiteConfig.pm add an additional line to indicate your Webdomain either IP or FQDN.
Example below:
sudo vi /opt/rt5/etc/RT_SiteConfig.pm
Set( $WebDomain, 'your-servers-ip' );
Restart Apache
sudo systemctl restart apache2
There still allot to do, like configuring an RT email gateway, task scheduler, full text search and general system security etc. That’s potentially for a future guide should there be demand. This guide does not cover server / application hardening and security as it is a broad topic and not the aim of this guide. You should always harden your servers by default! Some useful links:
Secure your MariaDB installation – https://mariadb.com/kb/en/mysql_secure_installation/
During this walk-through we will guide you on how to install a web based POS and ecommerce solution that can be used to sell your goods via your physical and online stores from the same backend. If you don’t have a WordPress base to start with follow the links below. (This was done as a response to a request by on of our subscribers)
How to install the WordPress base server: https://youtu.be/vvOES877BAM How to secure your WordPress Server: https://youtu.be/XocAaMKuQ_k